Interface overview
In this article, we'll walk you through the main interface of the landing page builder for iGaming, betting, and online casino.
1. Main control panel
This is the main workspace for building your landing page. In the center of the screen, you see your website in real time, and on the right is the control panel. From this panel, you can edit the properties of the selected element or block: change text, fonts, colors, backgrounds, add and remove blocks and images, and much more.
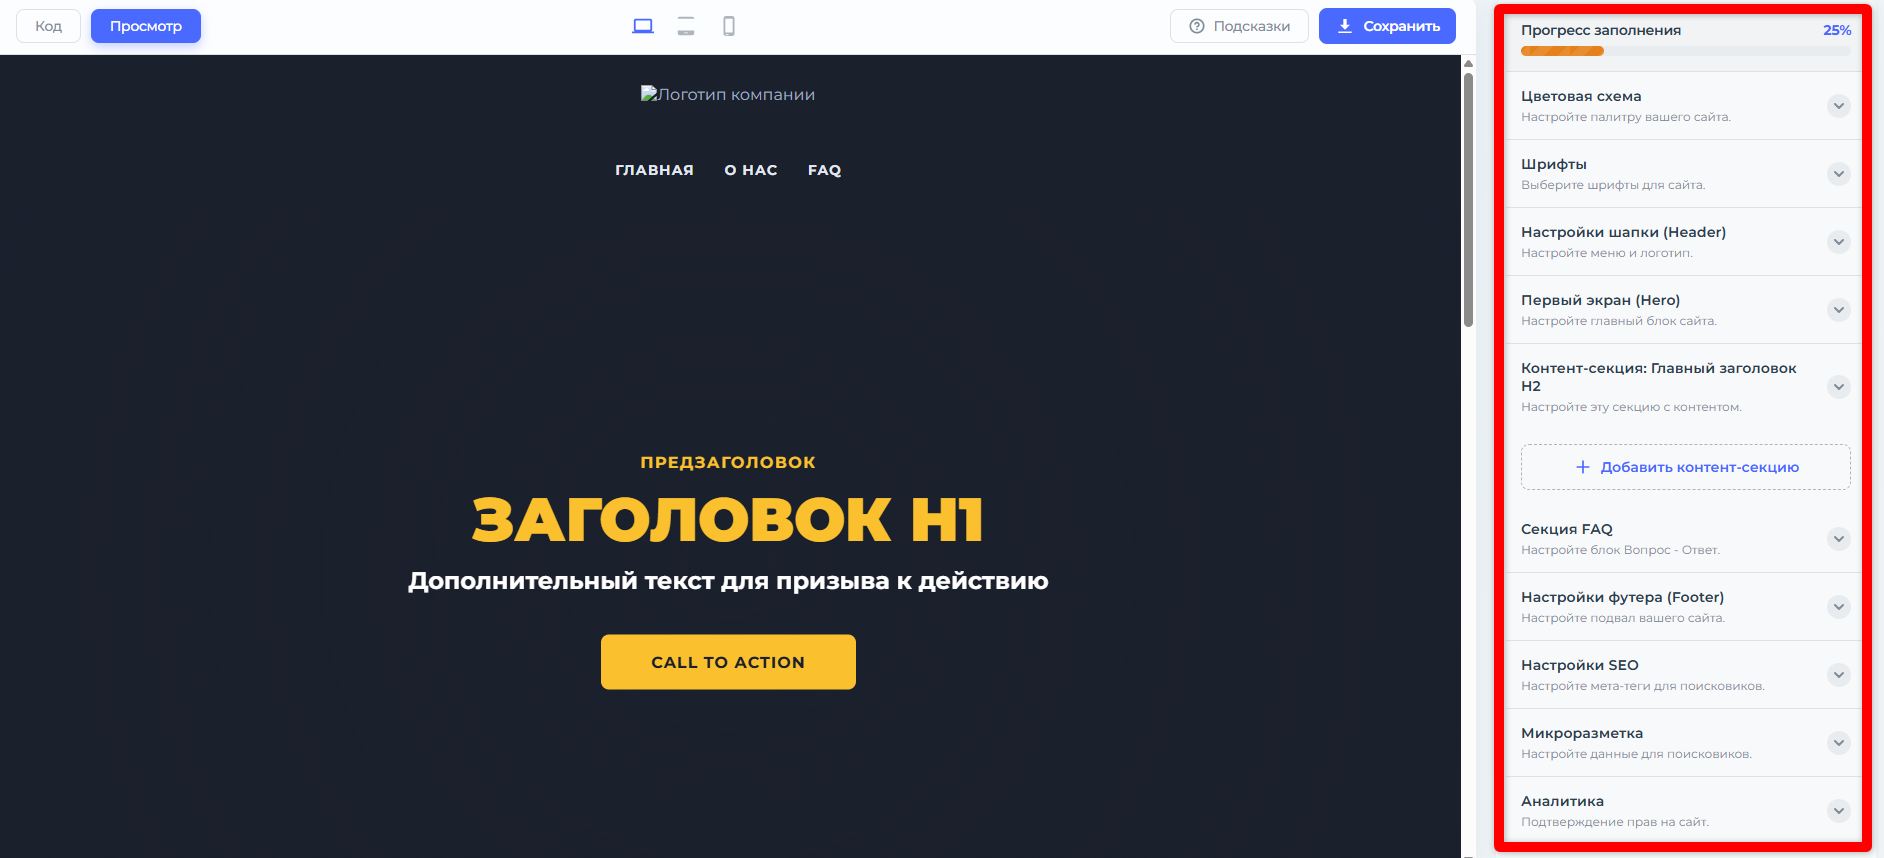
2. Code Editor
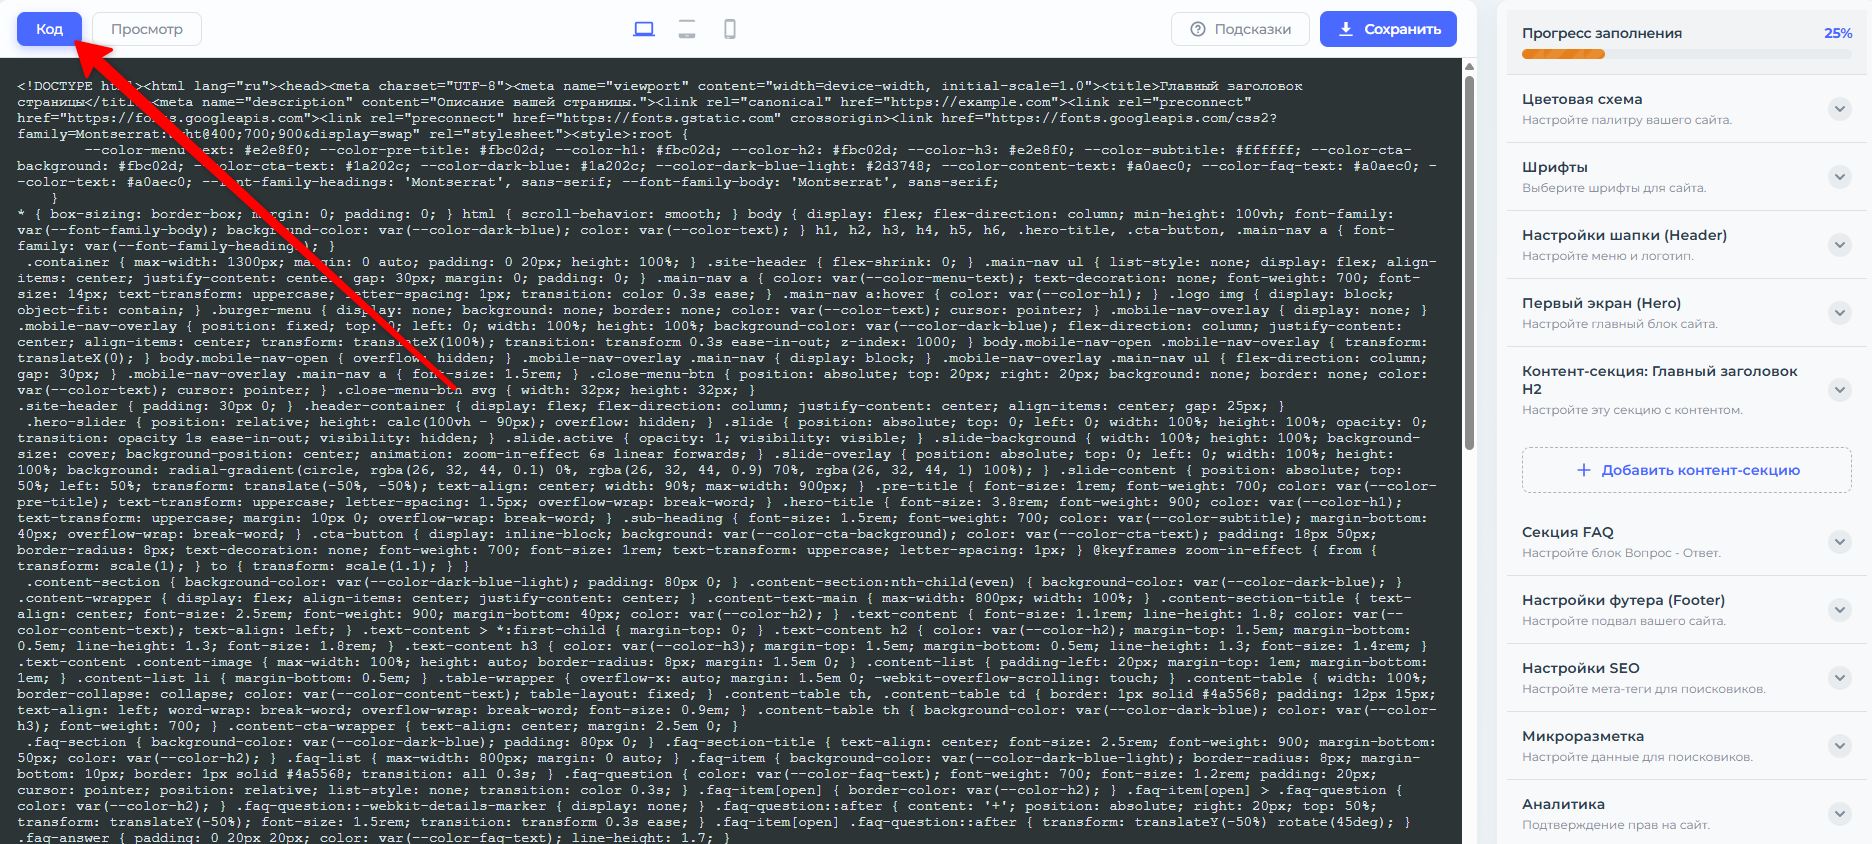
All the changes you make in the visual editor are automatically converted into production-ready code by the builder. You can always view and copy this code. This guarantees that your website is technically perfect: it's fast, responsive, and well-indexed by search engines.
3. Responsiveness
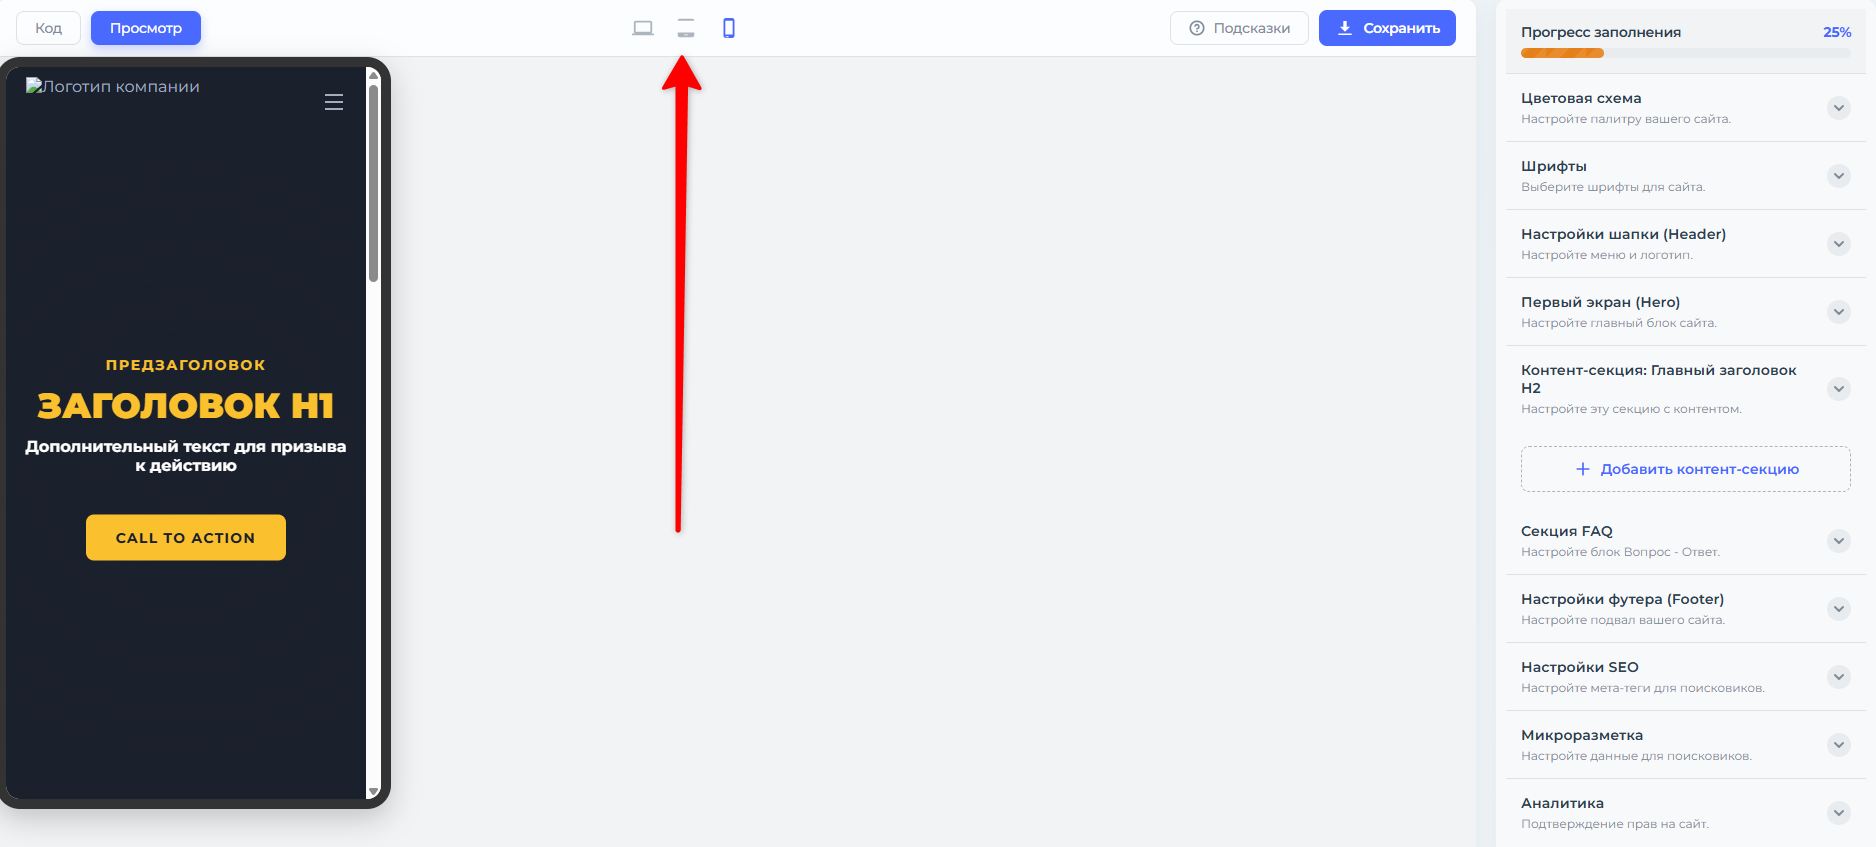
Using the device preview panel, you can instantly see how your landing page looks on desktop, tablet, and mobile. The builder automatically adapts the layout so that the website is easy to read and use on any device. You don't need to configure this separately.
4. Tips
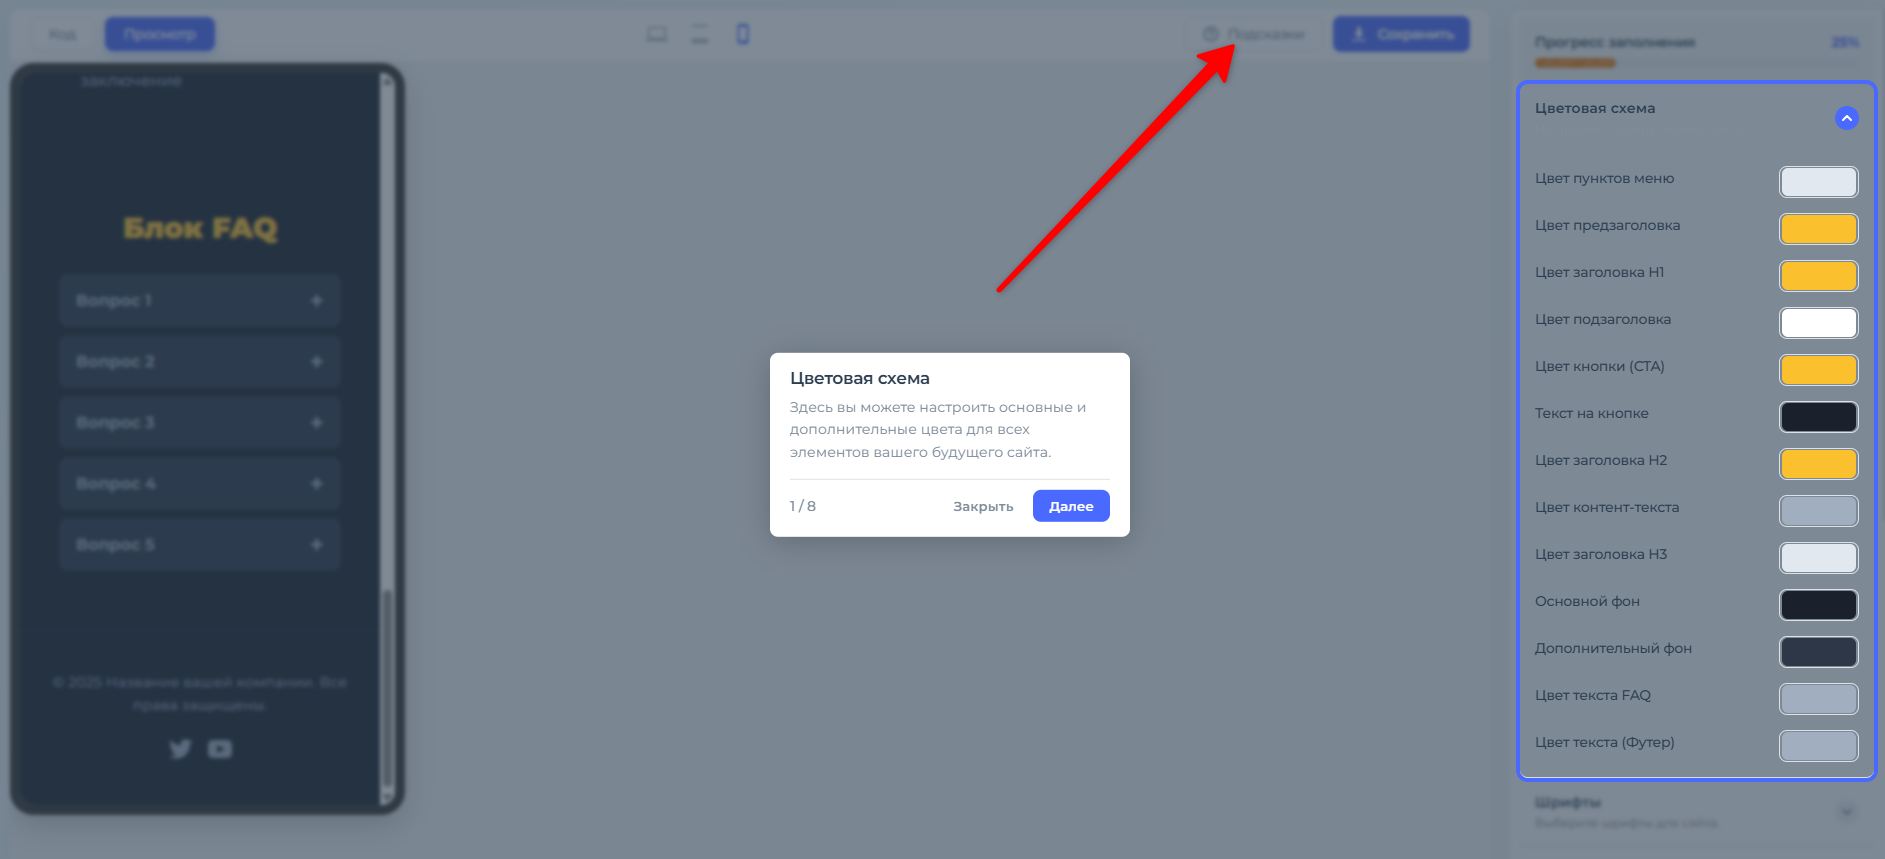
Click the "Tips" button in the top toolbar to launch the interactive guide. The system will walk you through each section of the menu step by step. Use the "Next" button to explore all the features of the builder.
5. Save Template
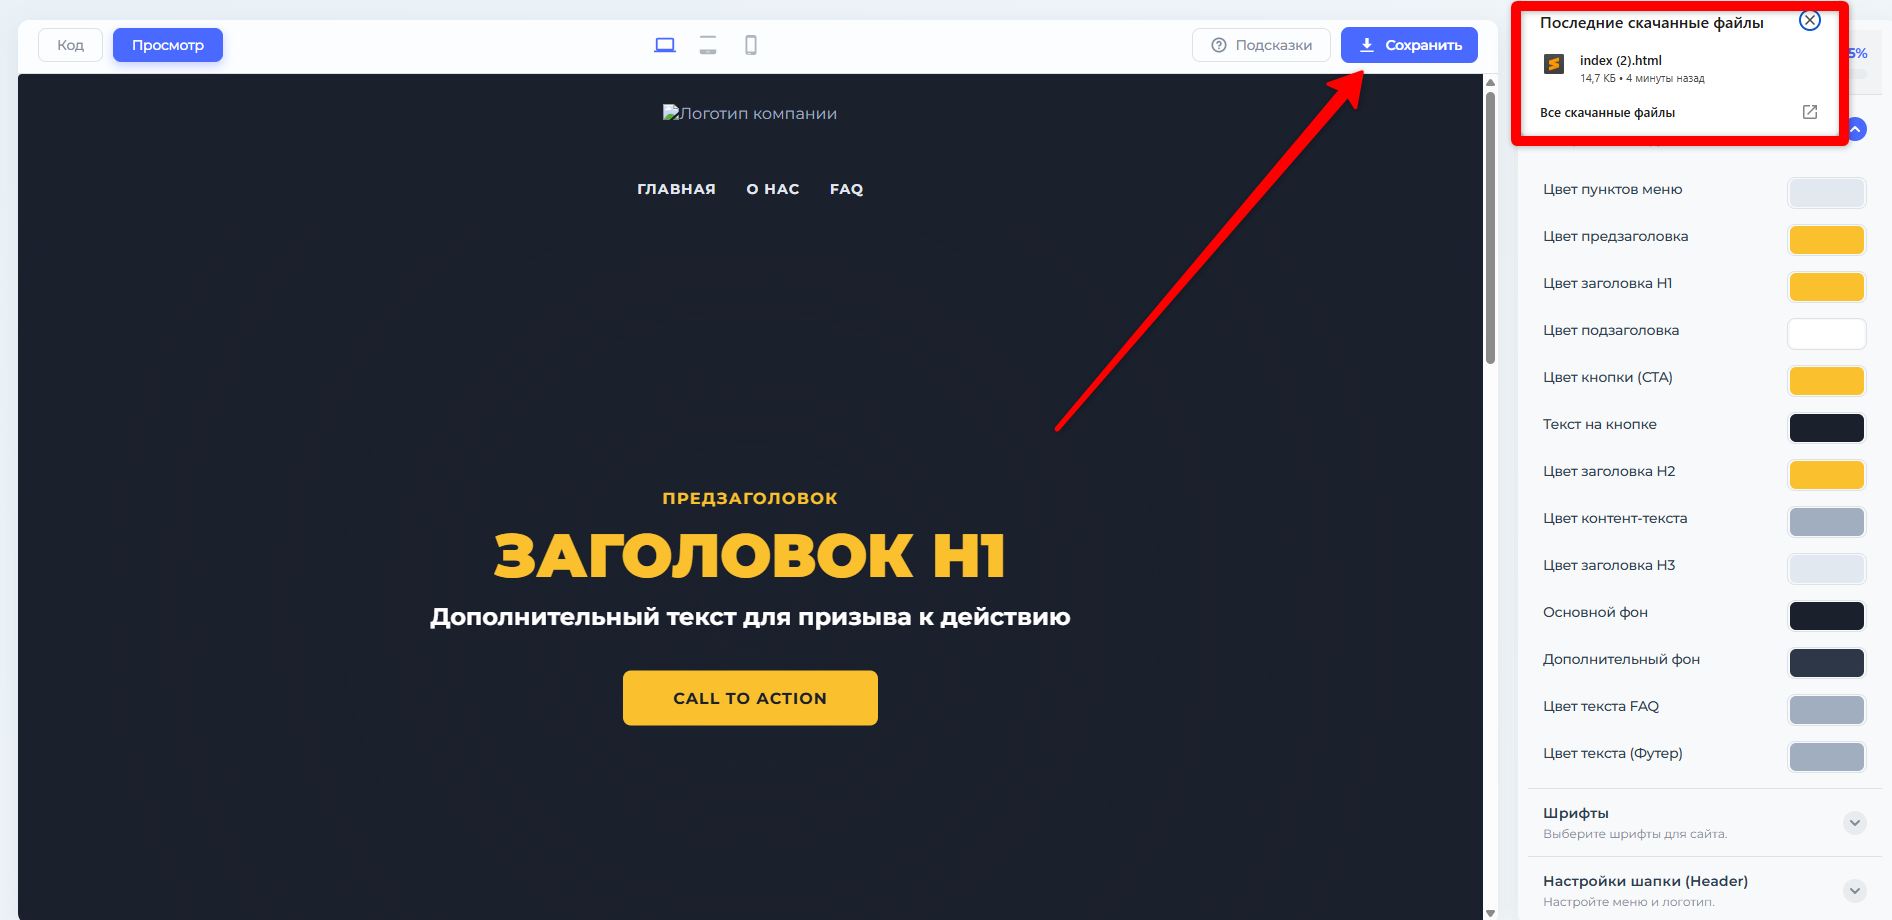
Click the "Save" button in the top toolbar to instantly download a ready-made HTML file of your landing page. All design elements will be packaged into a single optimized file that you can immediately upload to your hosting provider.
6. Website readiness indicator
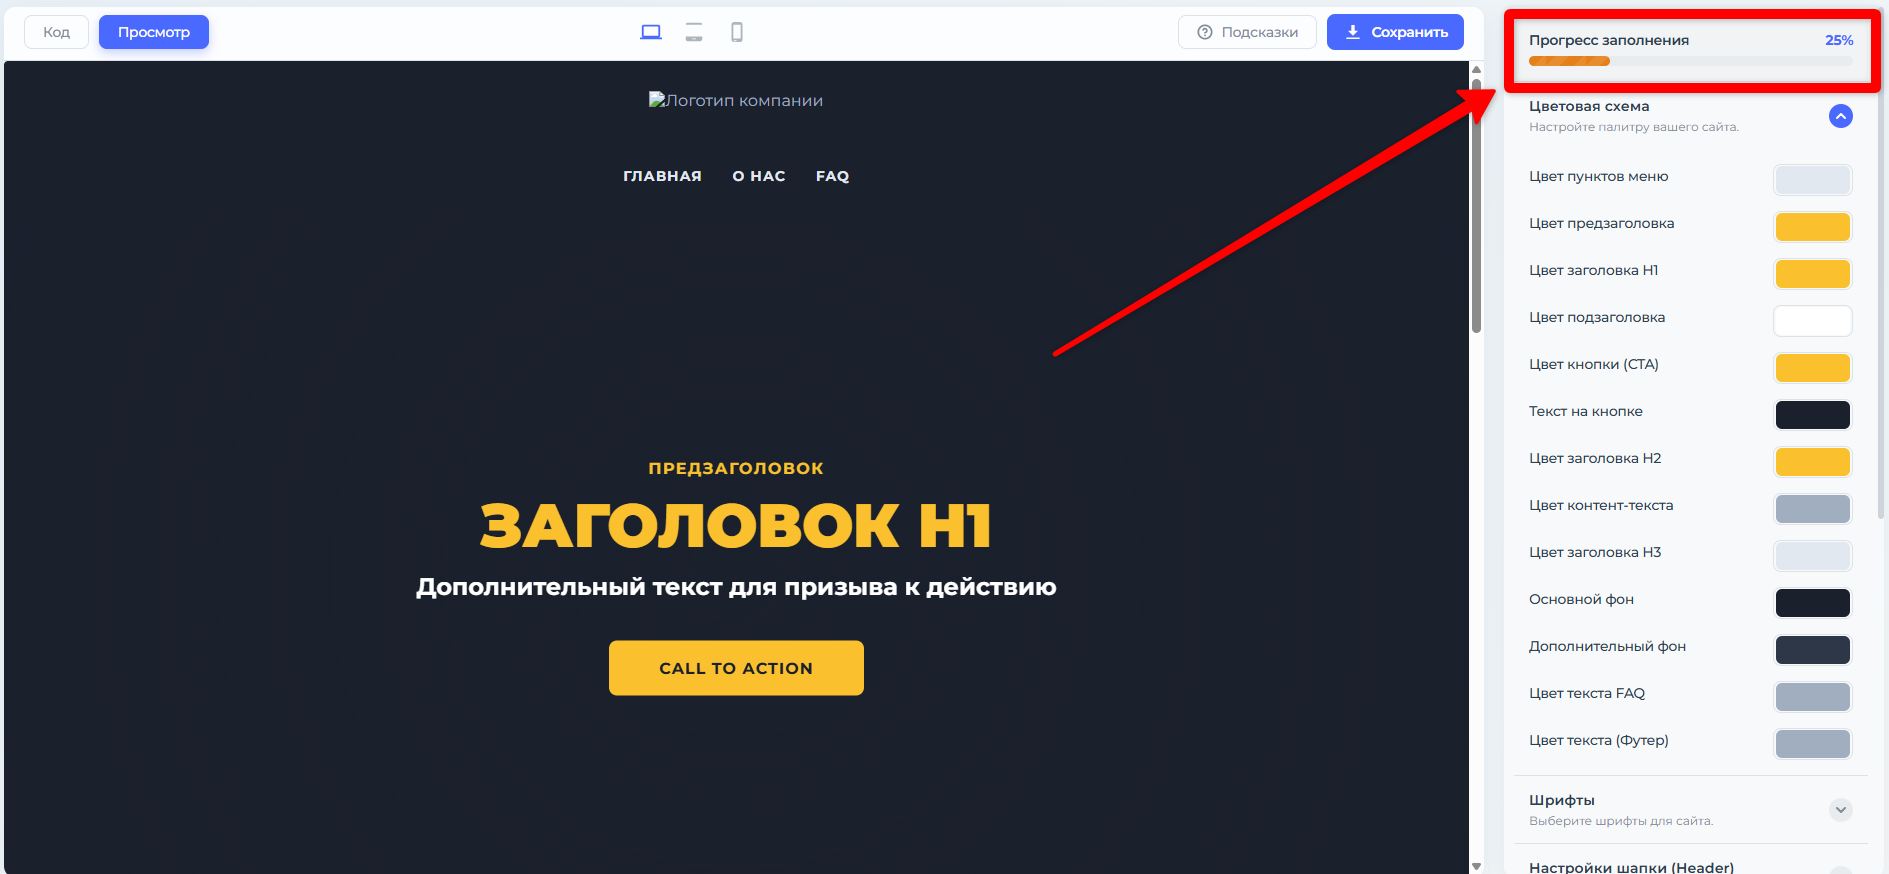
In the top toolbar, you'll see a progress bar showing how complete your landing page is. Aim for 100% — this ensures that all key blocks are filled in and the page is ready to publish.
7. Save button
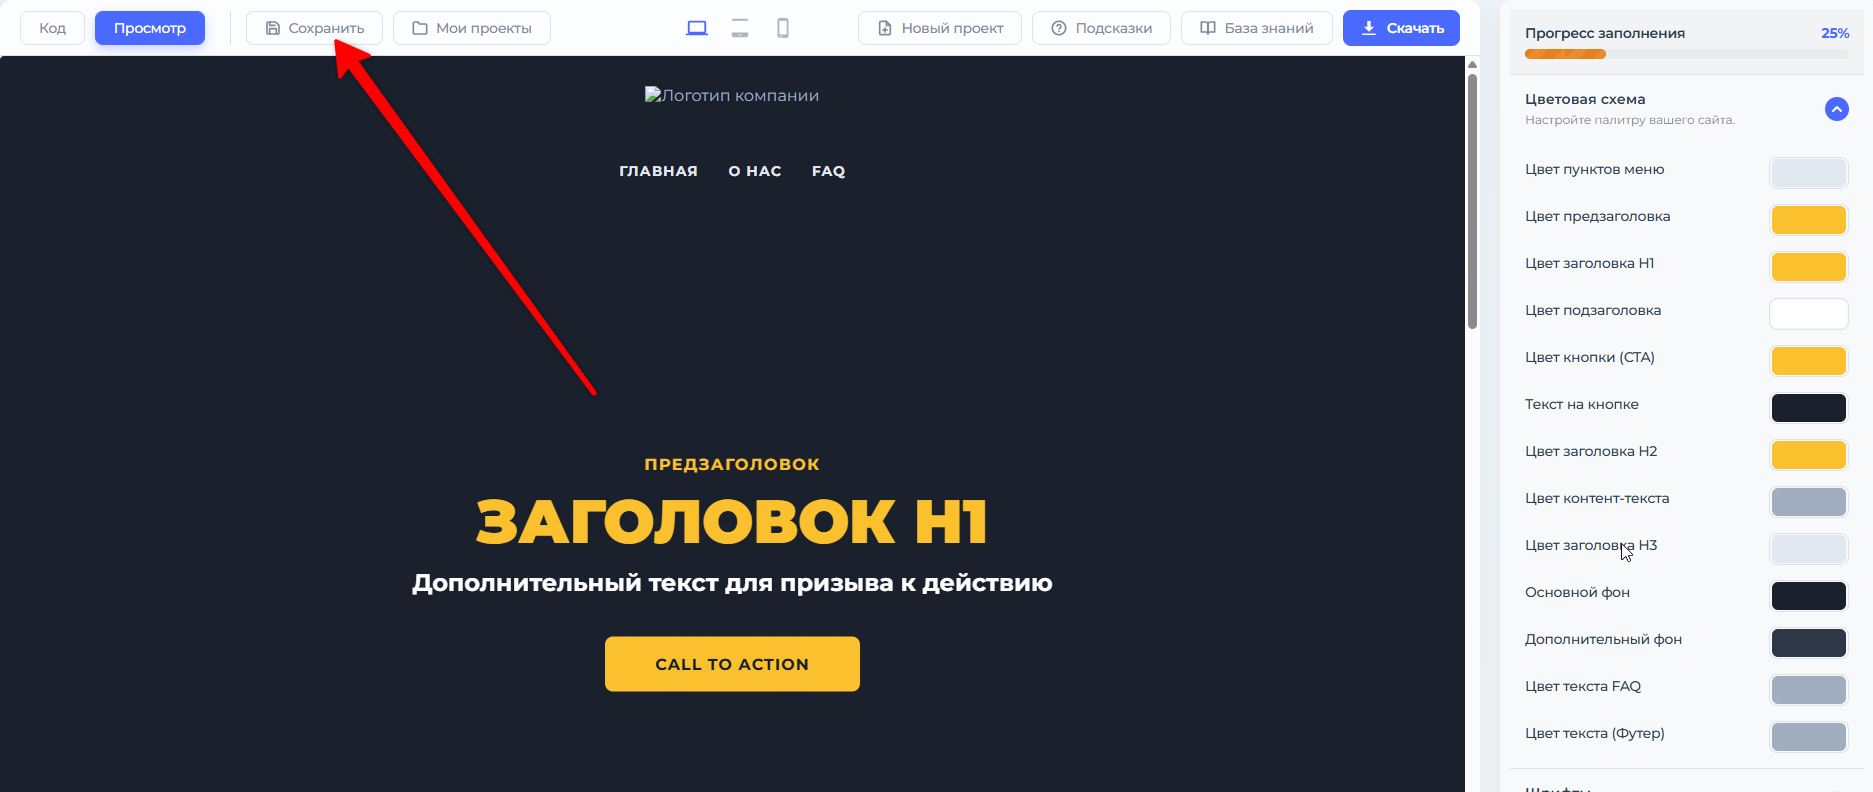
The "Save" button allows you to save the current project as a template for future use.
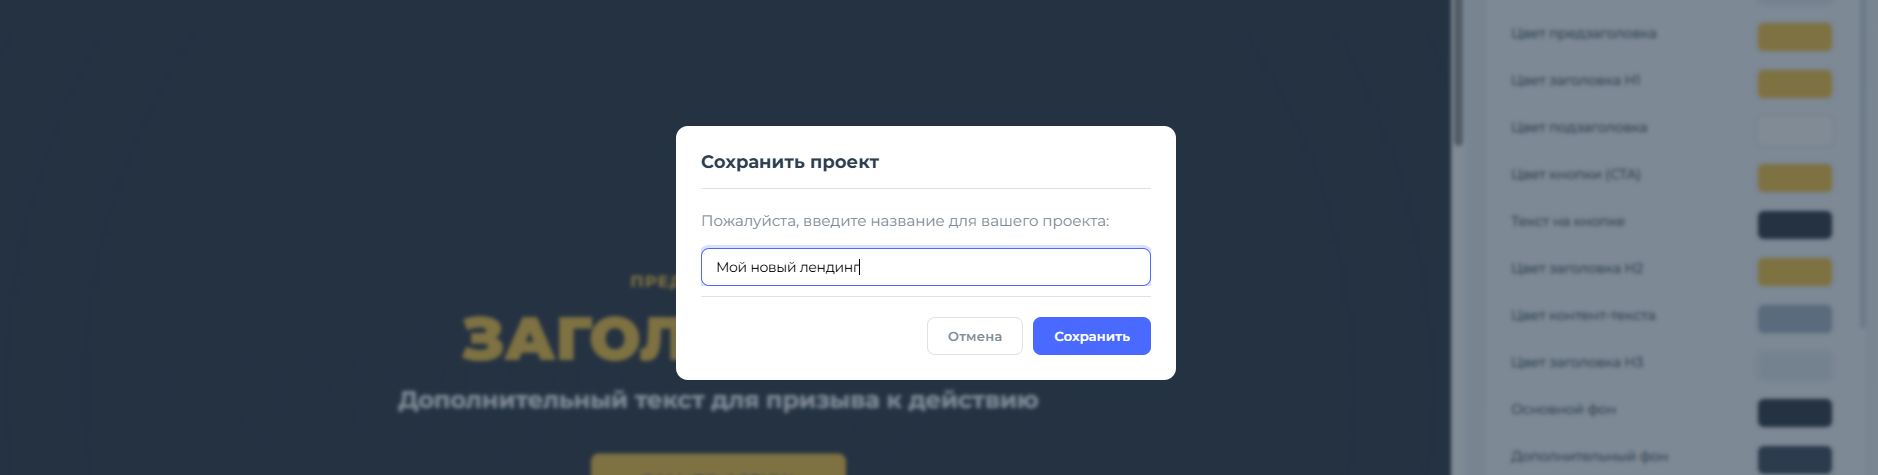
When you click this button, a "Save Project" pop-up will appear. Enter a unique name for your template and click "Save" to store all changes. You can return to this project at any time or use it as a base for new pages.
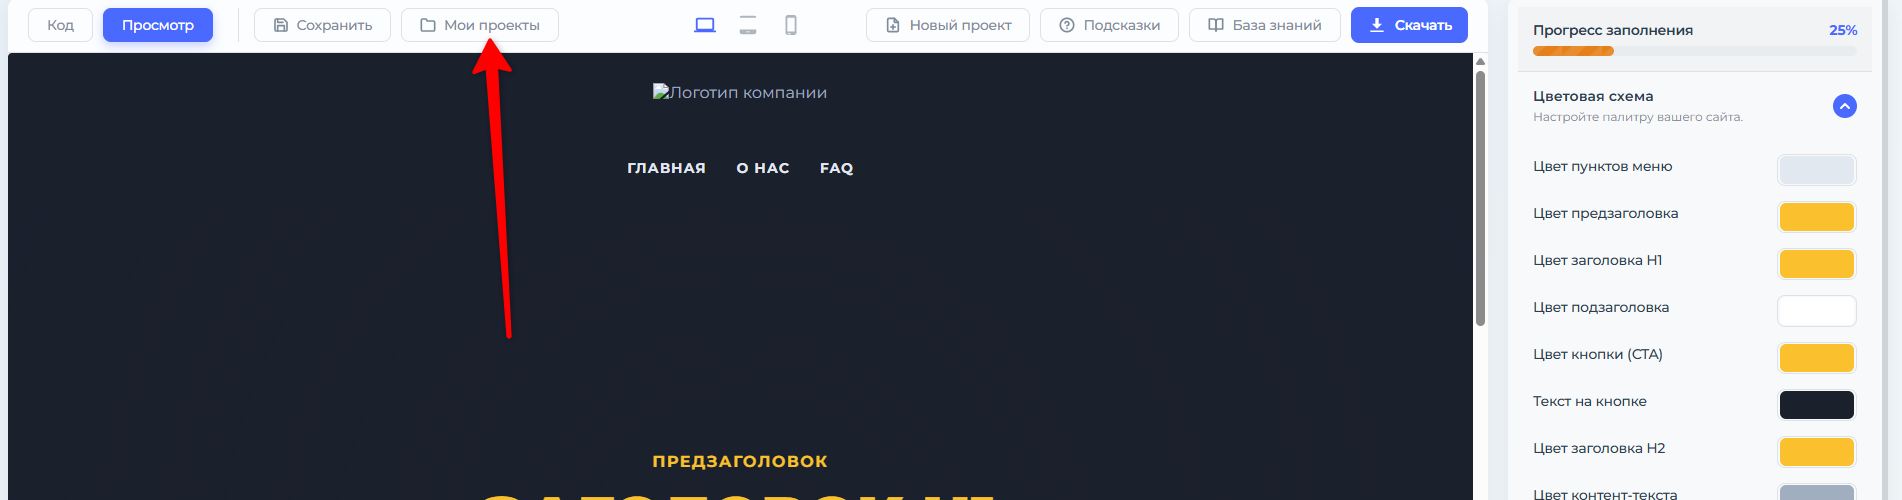
8. "My Projects" button
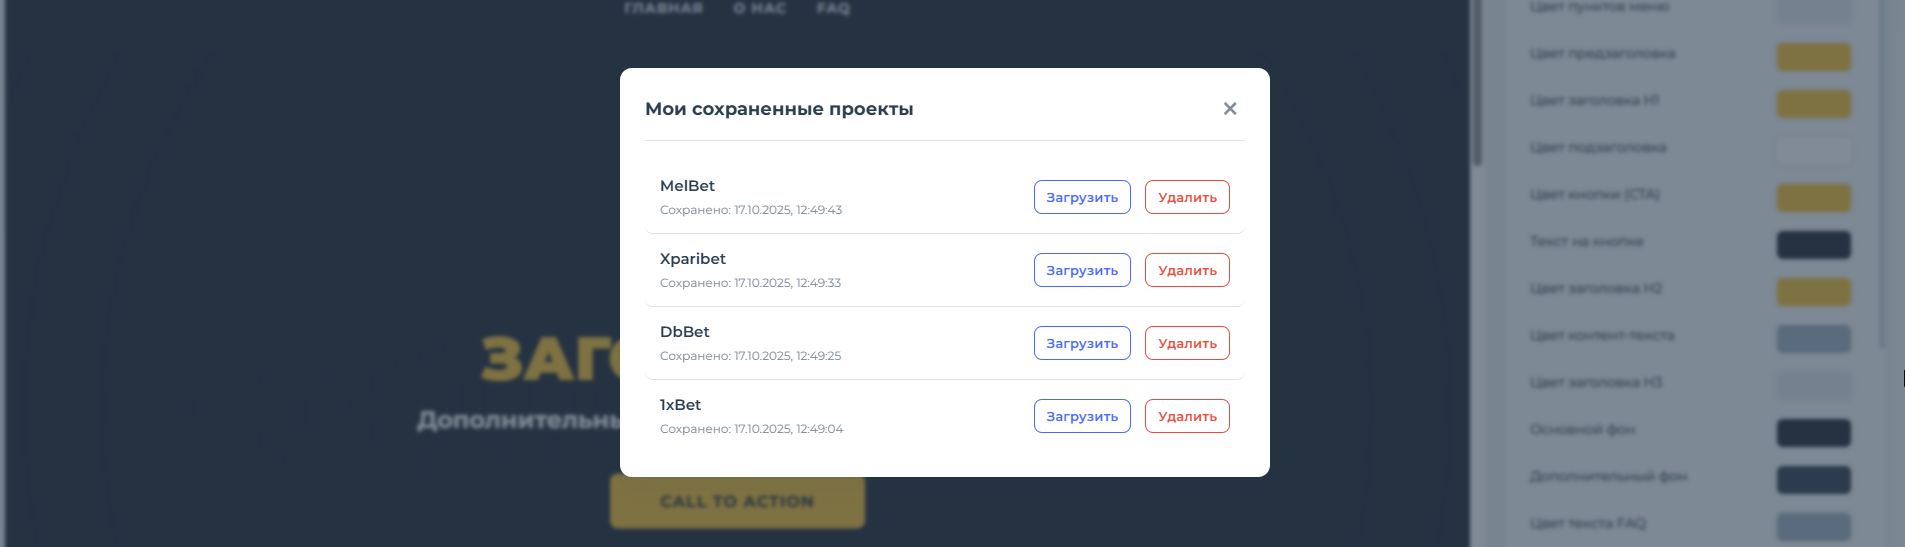
The "My Projects" button gives you access to all your saved templates.
Clicking it opens a window with a list of your projects. From here, you can quickly find a template to continue editing or delete it if it's no longer needed. This is a convenient way to manage all your work in one place.
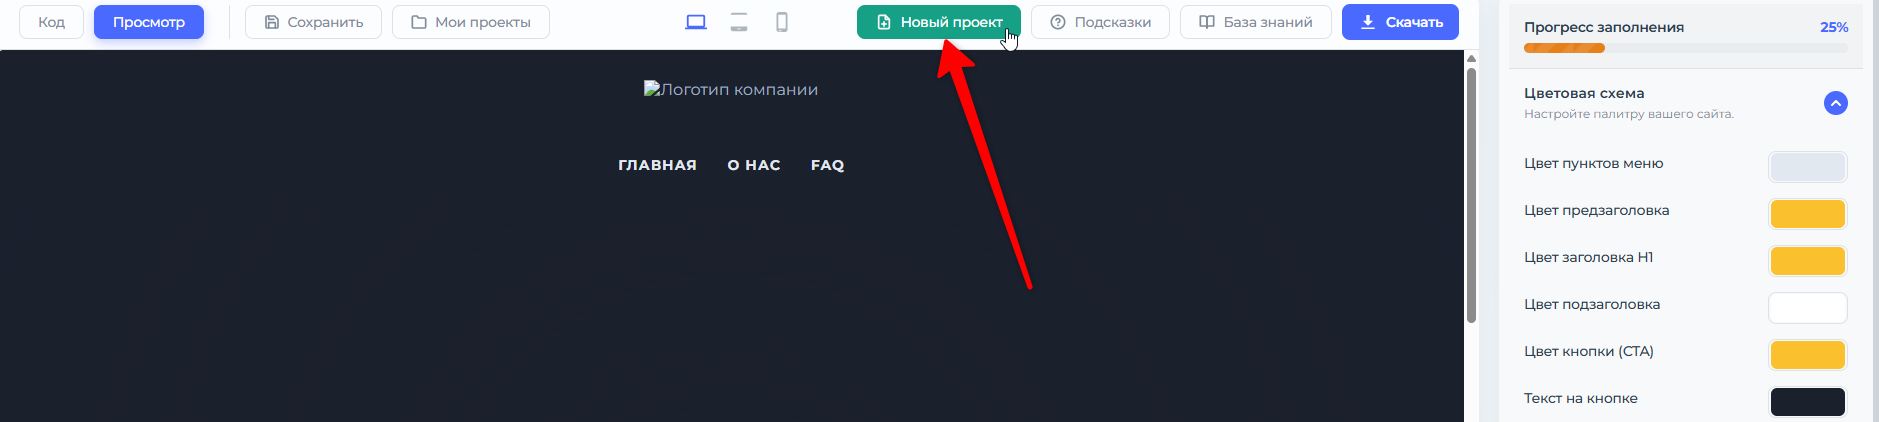
9. "New Project" button
The "New Project" button allows you to start from scratch, creating a completely new page.
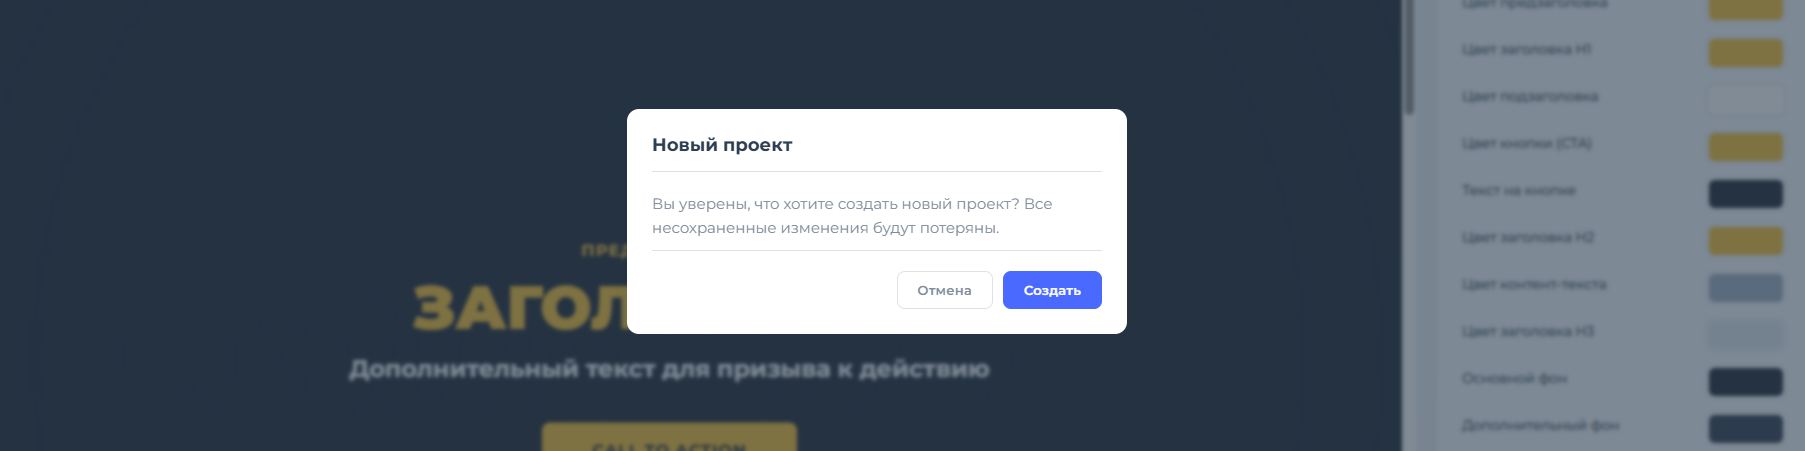
When you click this button, a confirmation pop-up will appear. This is an important step, as creating a new project will discard all unsaved changes in the current template. If you are sure you have saved all your important work, click "Yes" to continue. If you want to go back and save your current changes, click "Cancel".
Color Scheme
In this section, you can fully customize the color palette of your landing page to match your brand and create the desired mood for your visitors. Properly chosen colors improve readability, draw attention to important elements, and make the page visually appealing.
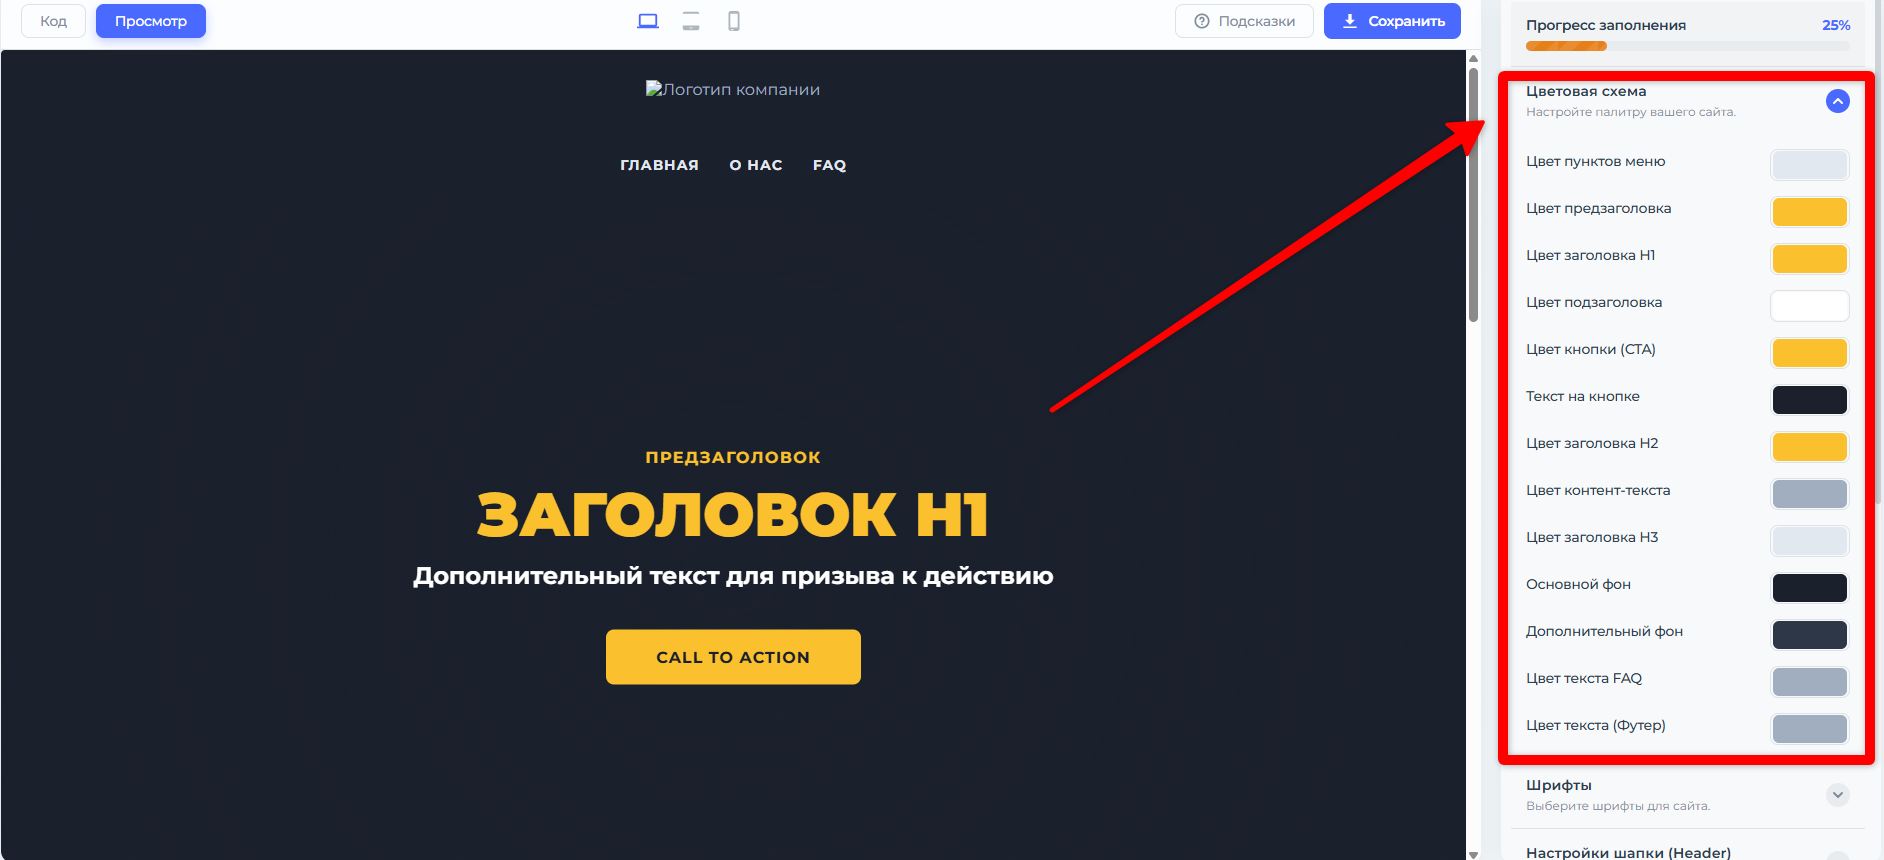
How do I use the color palette?
For each item in the list, you can choose a color in one of the following ways:
- Choose from the suggested palette: Click on the colored square to open the palette and select the desired shade.
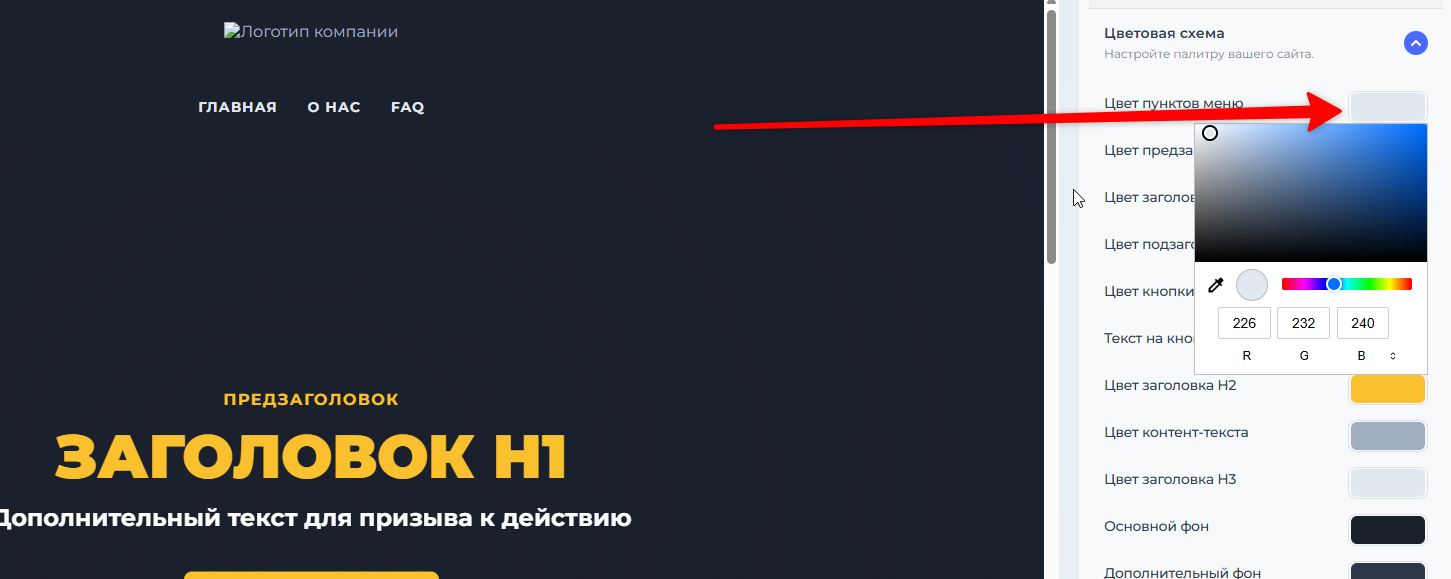
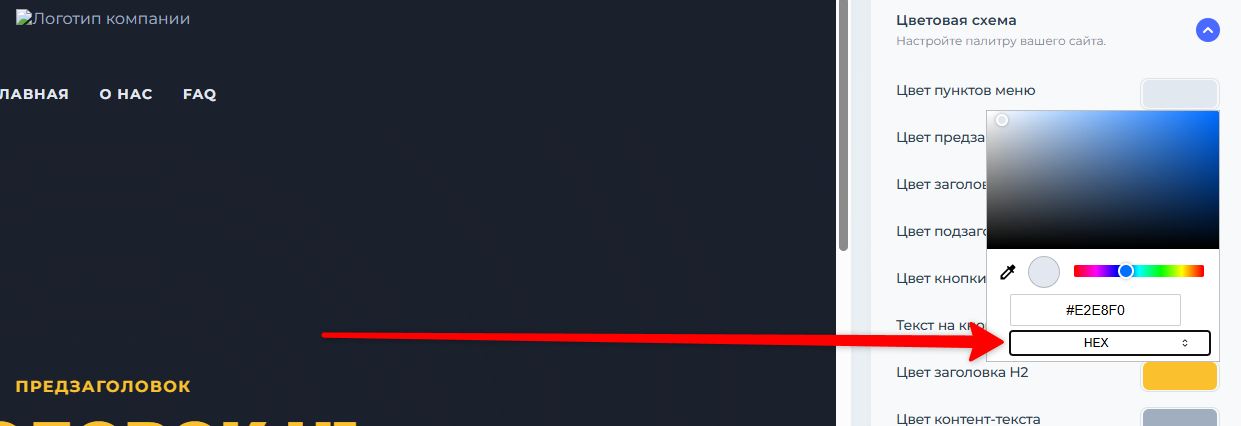
- Enter the color code: If you have the exact color code (for example, in HEX format – #FFFFFF), enter it in the text field. Click on the RGB panel to change the color mode.
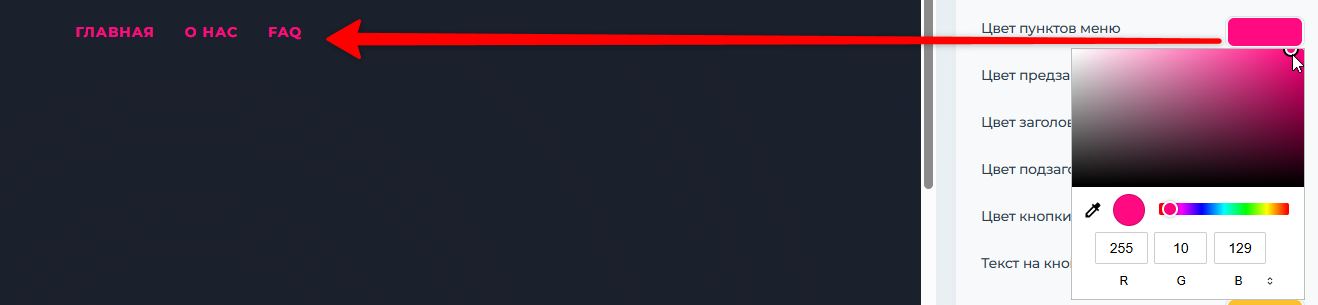
1. Color of menu items
This is where you can customize the text colors of the links in your website's navigation menu.
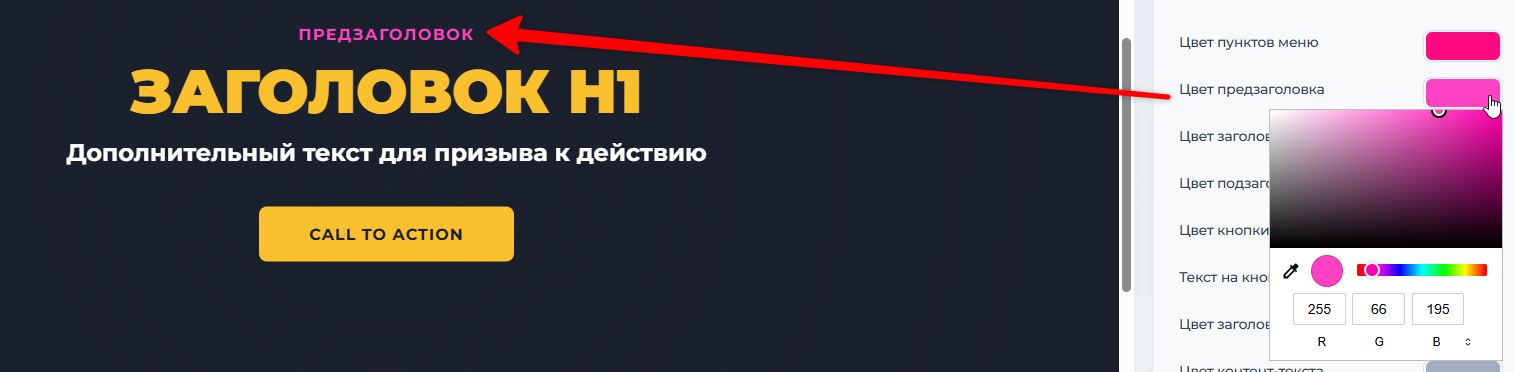
2. Subtitle color
This text is located above the main H1 heading. It is often used to attract additional attention.
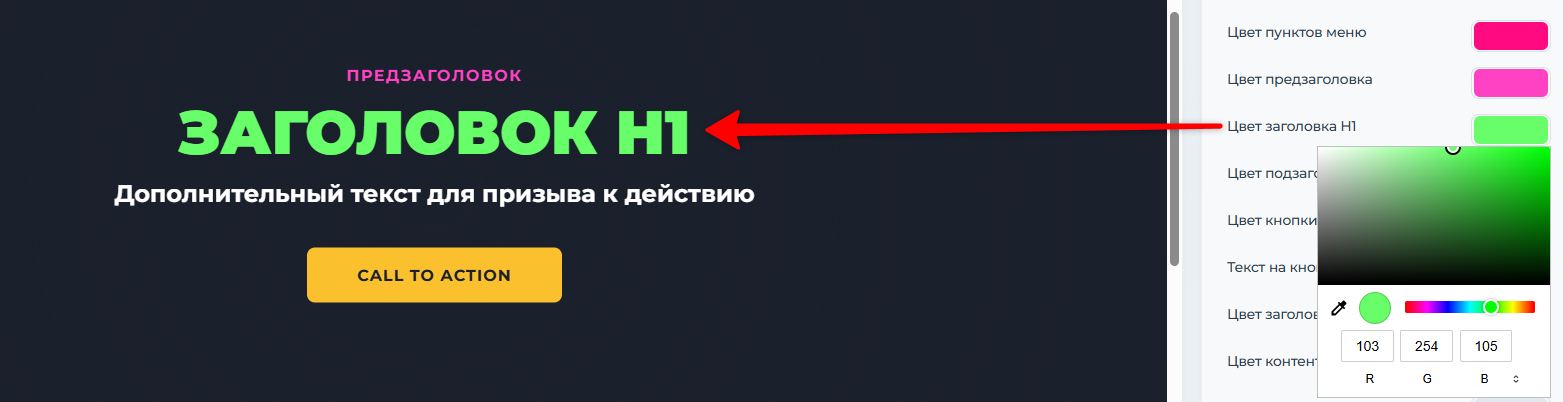
3. The color of the H1 heading
This is the main headline on the page. Its color should make it the first thing that catches the reader's eye.
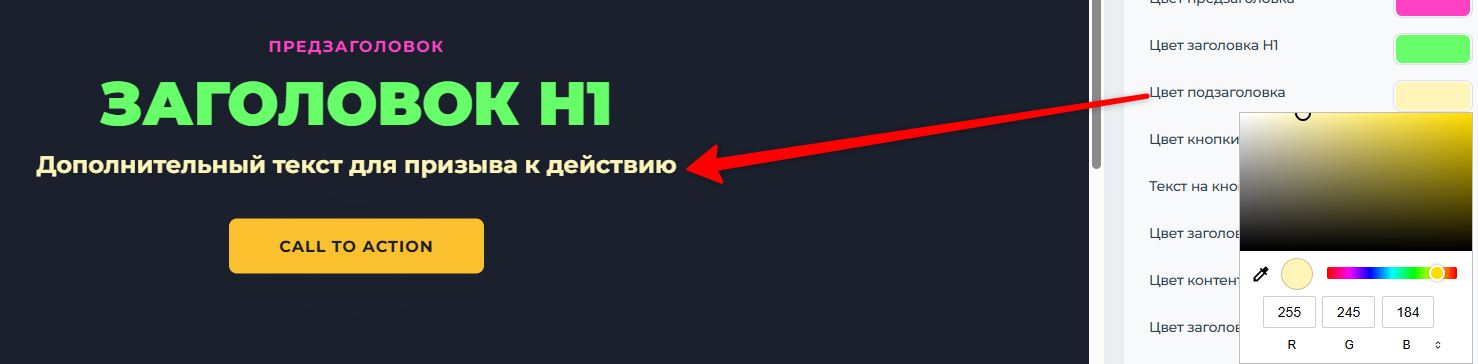
4. Subtitle color
Explanatory text under the H1 heading.
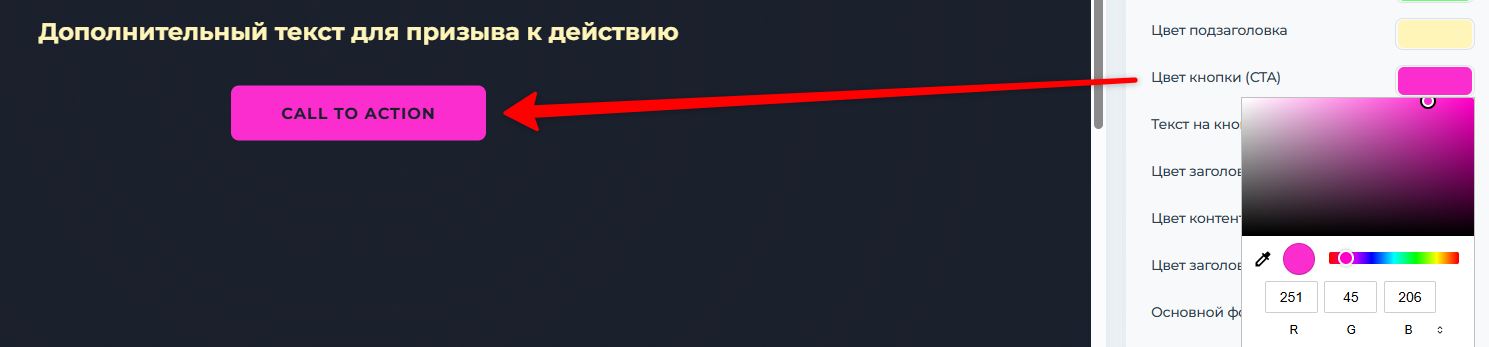
5. Button color (CTA)
A CTA (Call to Action) is a button that prompts the user to take a specific action (for example, "Buy," "Register"). Its color should be contrasting and noticeable to motivate the user to click on it.
6. Text on the button
The color of the text on the call-to-action button. It should be easily readable against the background color of the button itself.
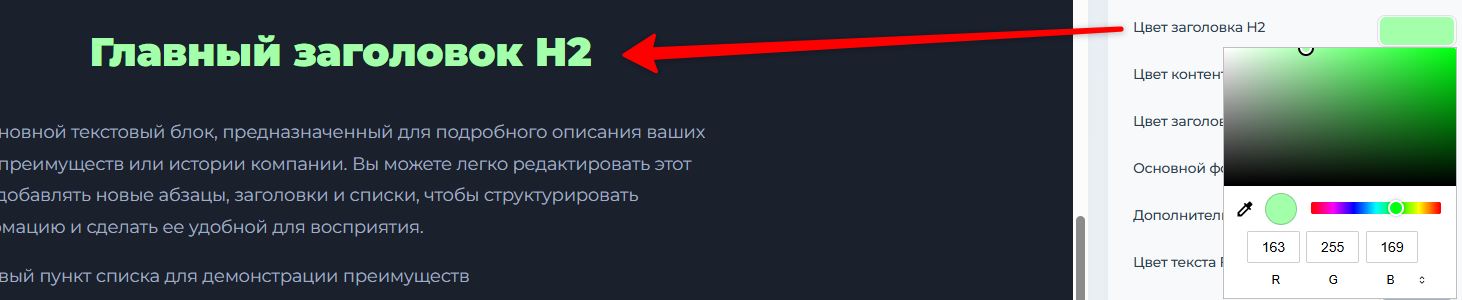
7. H2 heading color
Second-level headings are used for the titles of the main sections of the landing page.
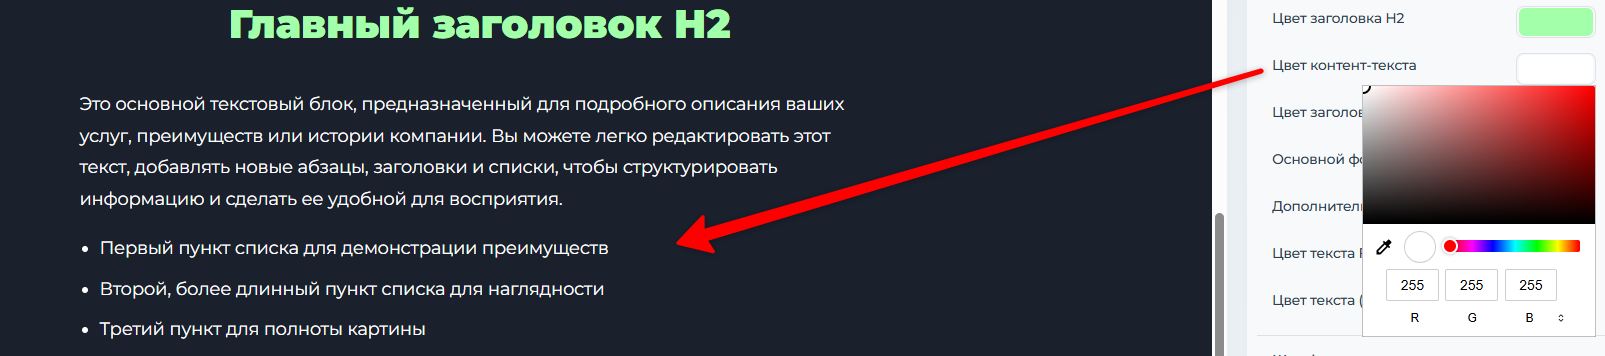
8. The color of the content text
This is the color of the main text on your page. It's important that it is easily readable and doesn't strain the eyes.
9. The color of the H3 heading
Level three headings are typically subheadings within sections.

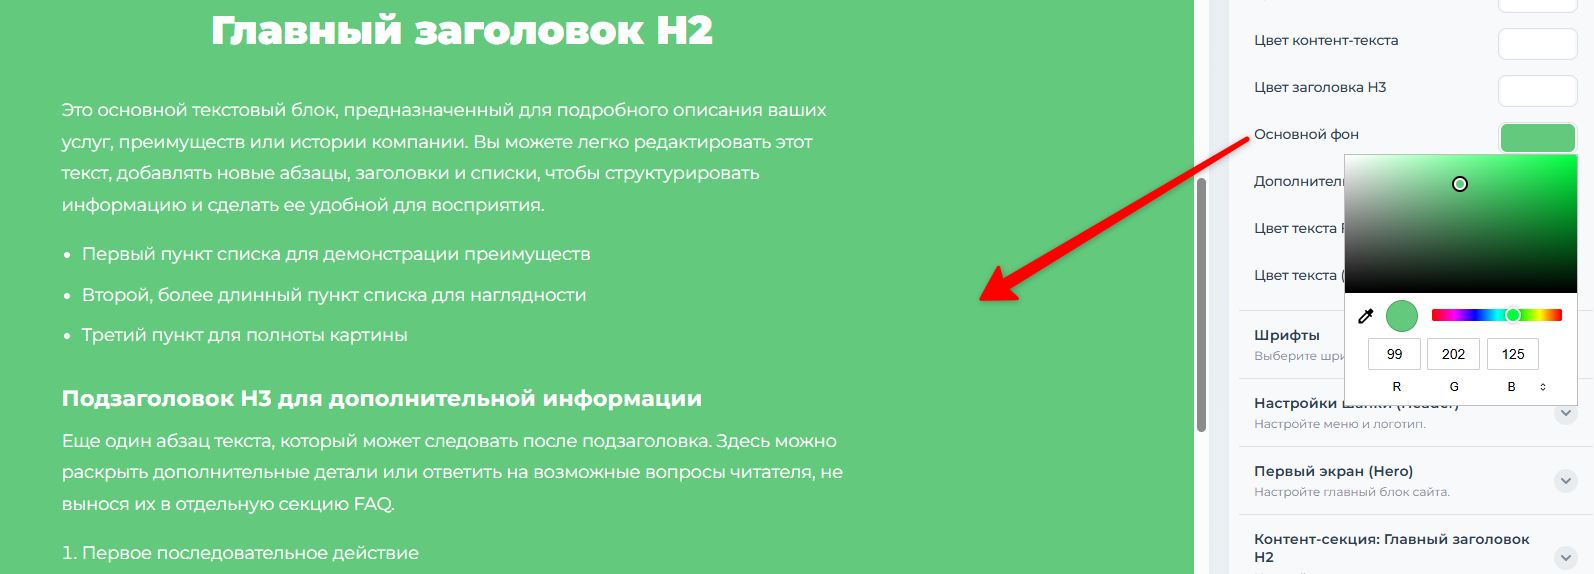
10. Main background
This is the main background color of your page. It sets the overall atmosphere of the landing page.
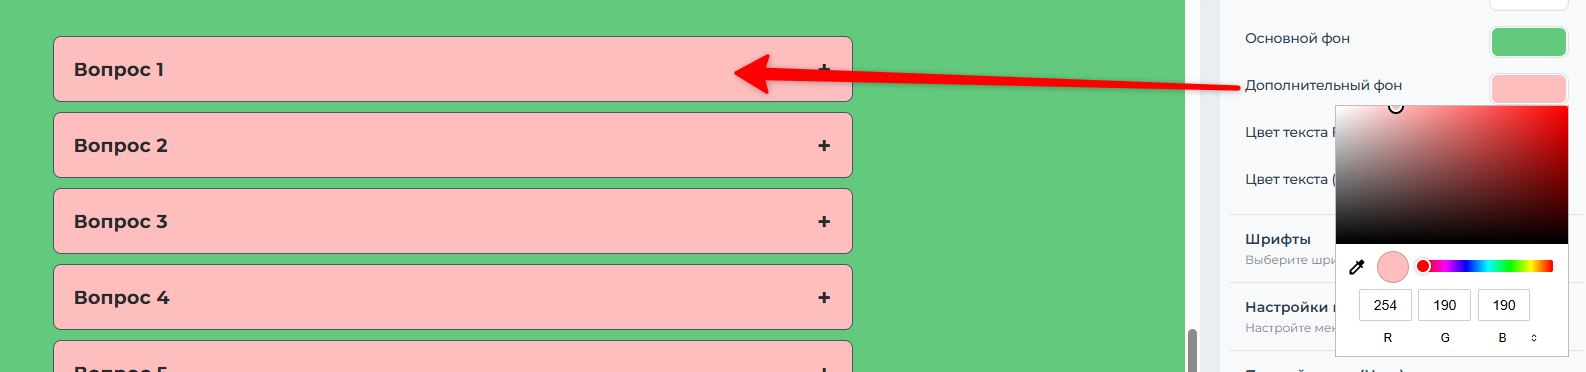
11. Additional background
It is used to highlight individual sections or blocks on a page (for example, an FAQ section, a section with advantages, or pricing plans). This helps to visually separate the content and improve its readability.
12. FAQ text color
The text color in the "Frequently Asked Questions" section.

13. Text color (Footer)
The text color in the very bottom section of the website (the footer), where contact information and additional links are usually located.
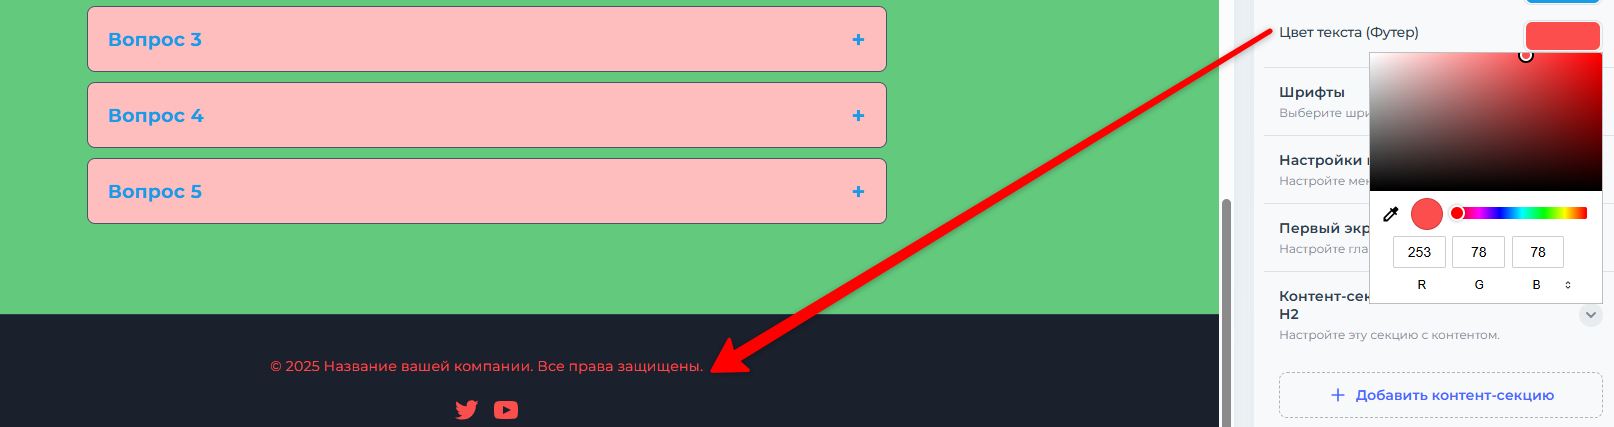
Tip: After making changes, be sure to check how all the elements look on the page. Make sure the text is easy to read and that important buttons stand out from the background.
Fonts
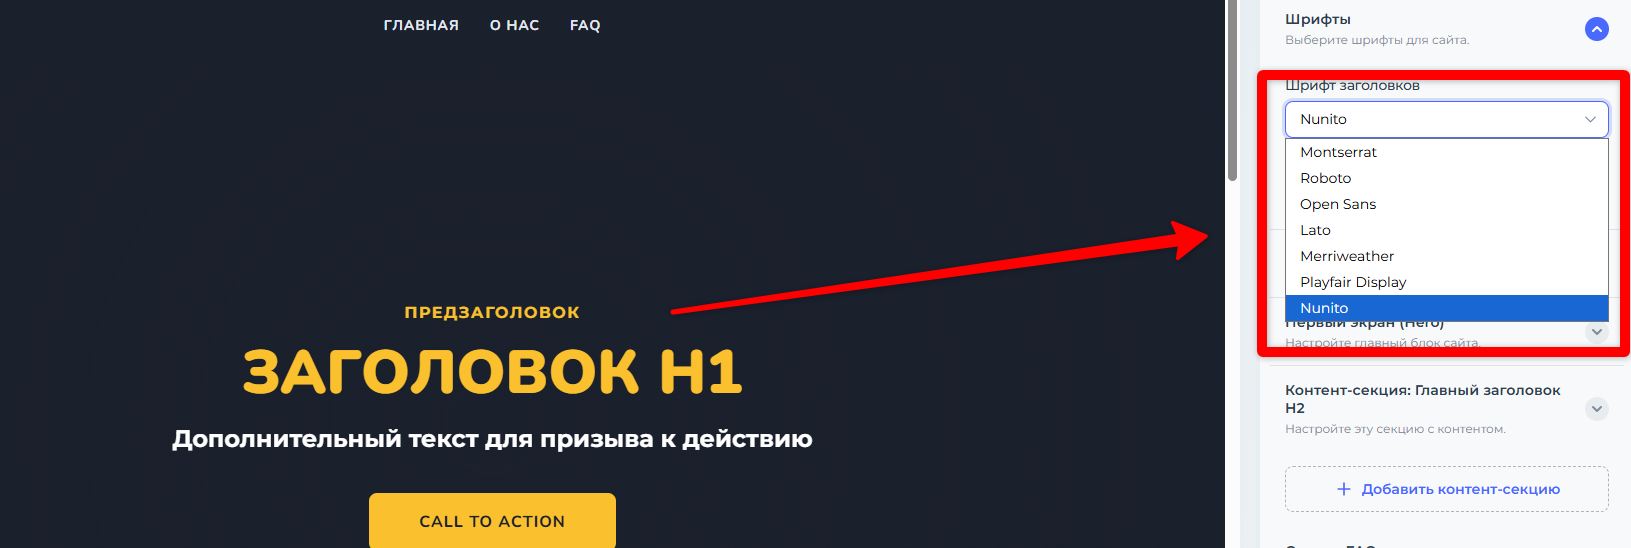
Choosing the right fonts is key to a professional-looking landing page and a positive user experience. In this section, you can set a unique style for text elements to improve readability and add visual emphasis. You will be presented with a dropdown list of proven and attractive fonts. Simply choose the one that best suits your brand's style.
1. Font for headings
This setting applies to all headings on your page (H1, H2, H3, etc.). The heading font is usually bolder and more expressive; its main purpose is to draw attention to the key sections of the landing page.
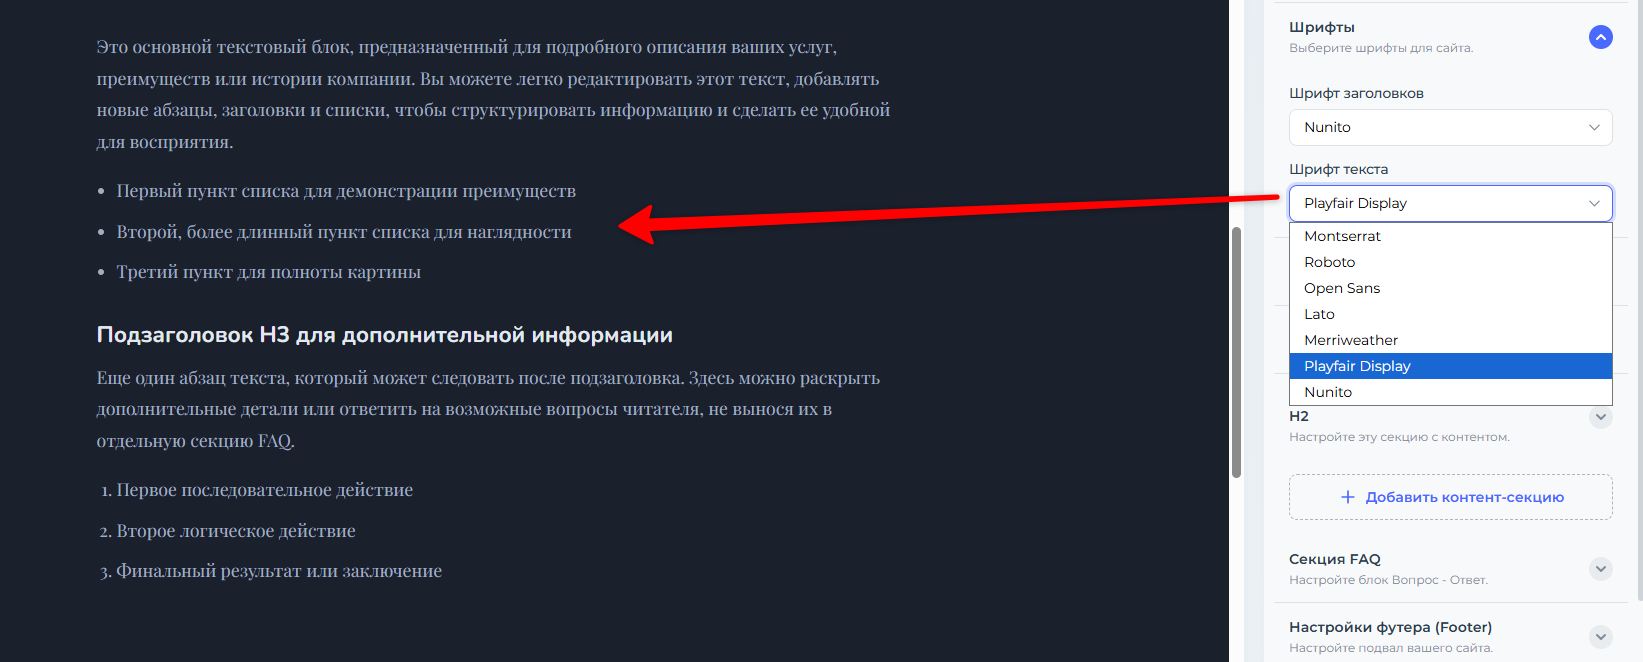
2. Font for the main text
This font will be used for all content text: paragraphs, descriptions, lists, and other text blocks. The main requirement is readability. Choose a clean, simple font that won't tire the reader's eyes.
Header settings
The website header is the first thing your visitors see. It's located at the very top of the page and usually contains the logo and navigation menu. Properly configuring the header helps users navigate the landing page and strengthens your brand recognition.
1. Logo management
The logo is the face of your company. You can easily add it to the website header.
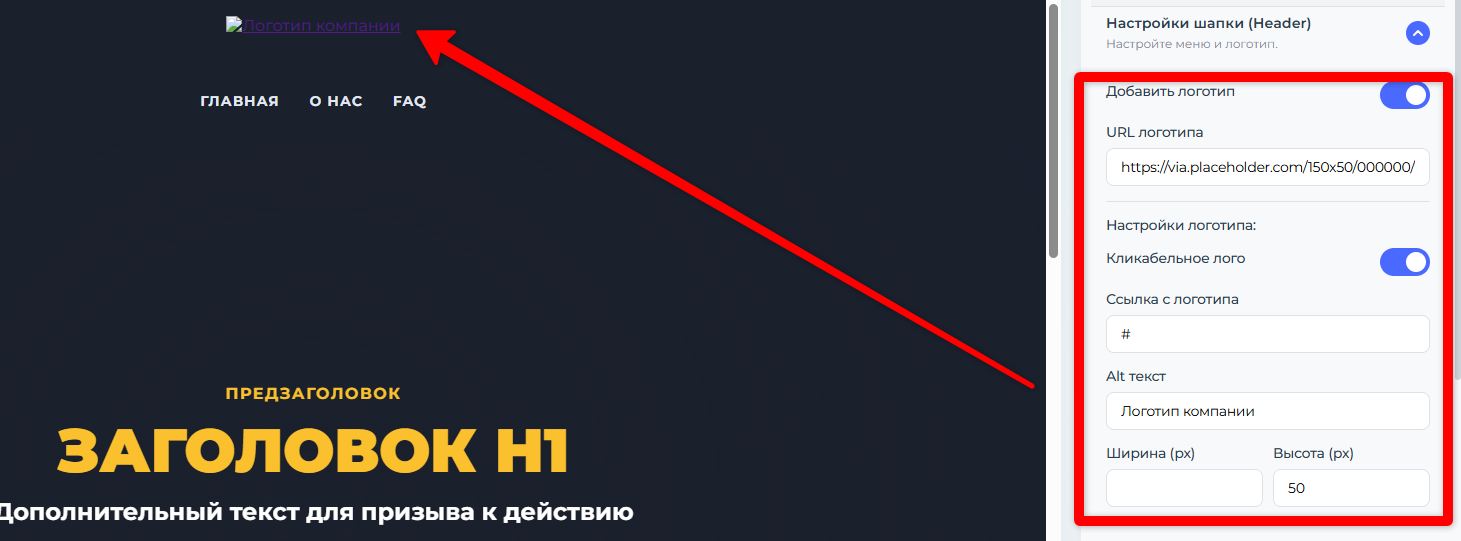
- Add or remove the logo: Use the toggle switch to show or hide the logo block. To upload your own image, simply click the corresponding button and select the file from your computer.
- Adjusting logo dimensions: Using the "Width (px)" and "Height (px)" fields, you can set the exact dimensions of your logo to ensure it looks neat and proportionate.
- Link on the logo: Activate this option to make your logo clickable. Typically, this is used to insert a link leading to the main screen (anchor link #top) or to the main website.
- Alt text for the logo: This is a required field for SEO. Enter your company name here. This text will be read by search engines and displayed to users if the image fails to load.
2. Configuring the navigation menu
The menu helps users quickly navigate through the sections of your landing page. You can configure up to 6 menu items.
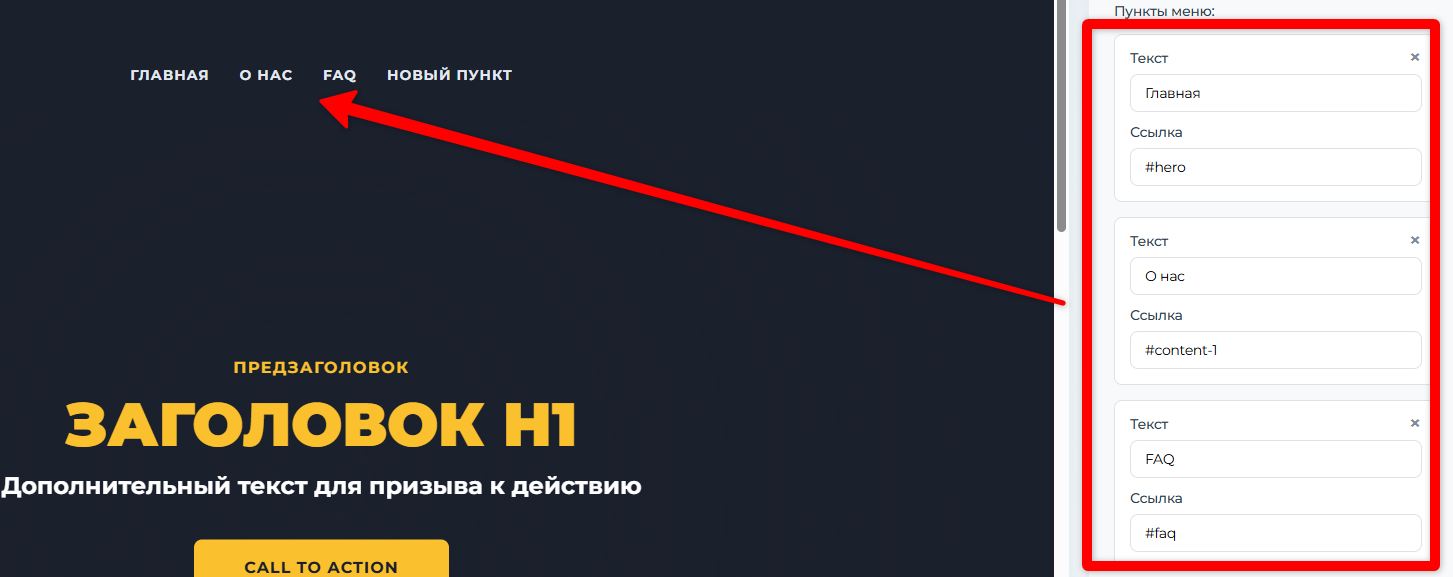
- Adding and editing menu items: In this section, you can change the names of menu items (for example, "About Us", "Services", "Pricing", "Contacts") and set anchor links for them.
- What is an anchor link? It's a link that doesn't lead to another page, but to a specific section on the same page. When you click on such a menu item, the page will smoothly scroll to the corresponding section.
- How to set up an anchor link? Each block on your landing page has a unique ID (for example, id="mobile-app"). To link to it, you need to enter this ID in the menu item's link field, preceded by a hash sign (#). For example: #mobile-app.
Settings for the "Hero Section" block
The "Hero Section" is the centerpiece of your landing page. It's the first thing a user sees when visiting your website. Your goal is to capture their attention within 3–5 seconds, clearly communicate the main offer, and motivate them to take action.
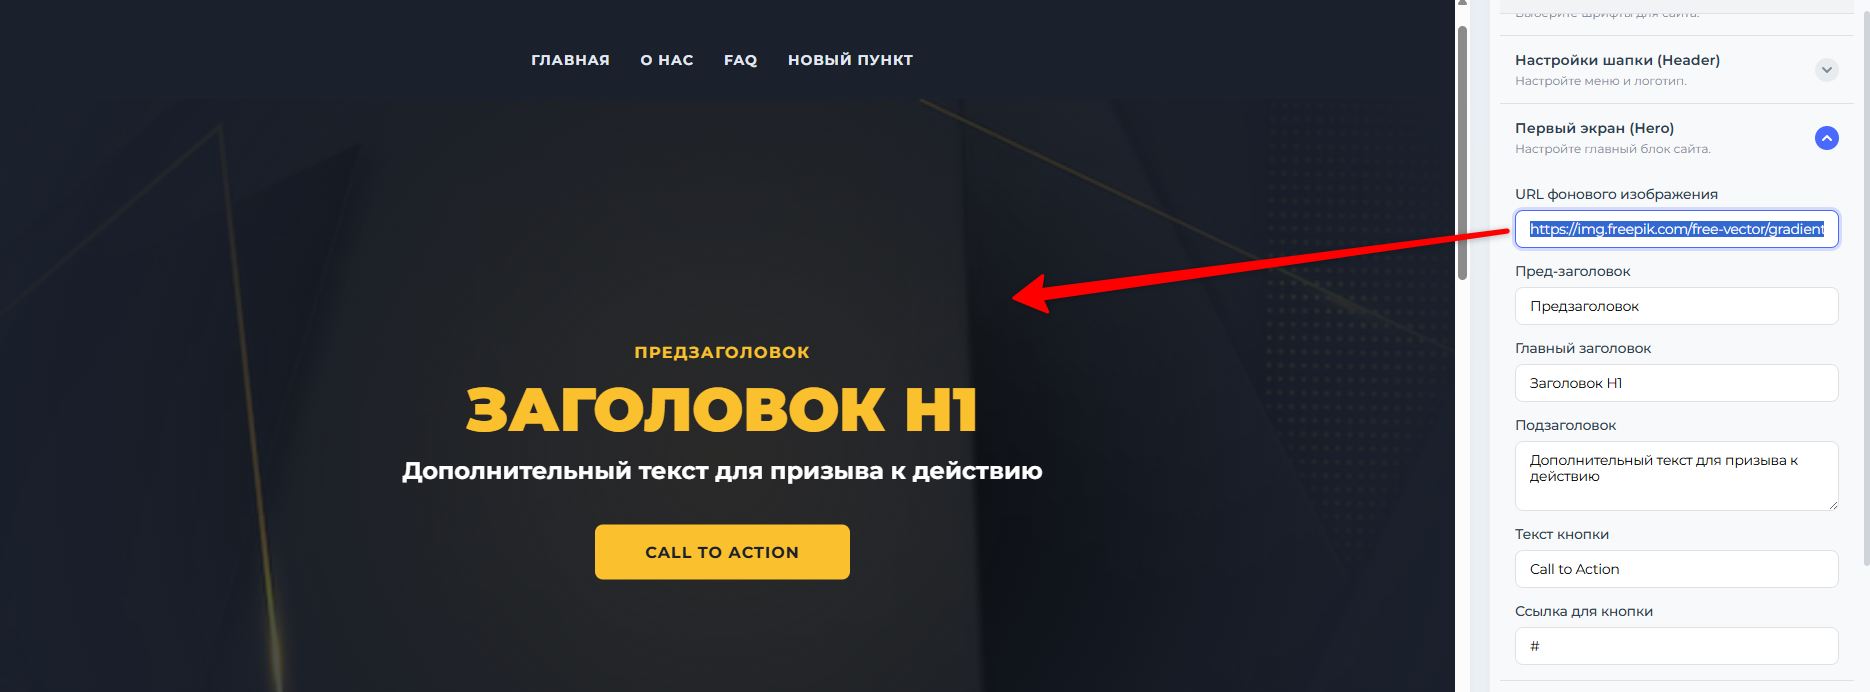
1. Background image
This is the visual foundation of your first screen. A well-chosen image sets the mood, conveys the essence of the product, and makes the page appealing.
Background image URL: Insert the direct link to the image you want to use as the background here.
2. Text content
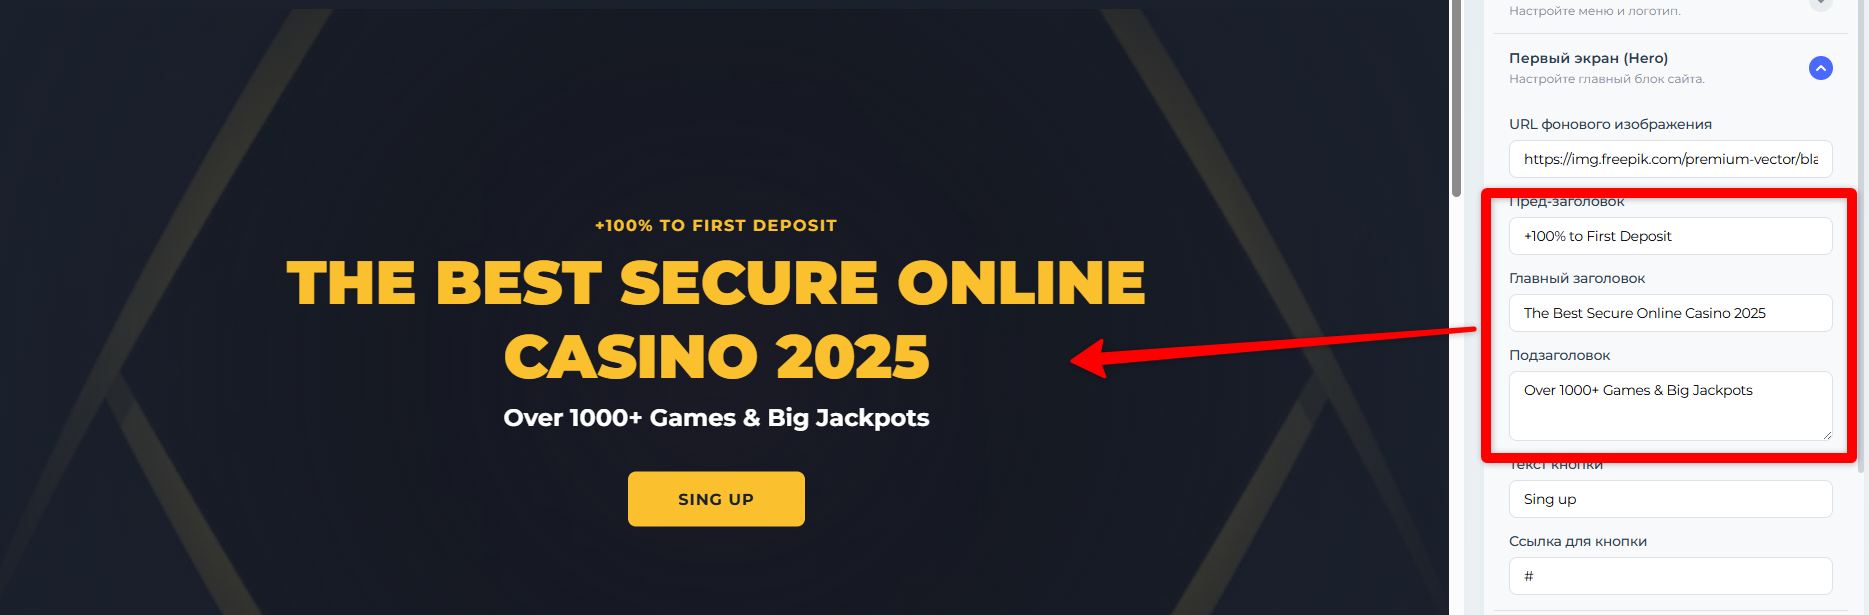
The text on the first screen should be concise, compelling, and hit the target precisely.
- Pre-headline: A short phrase above the main headline. Use it to hook the visitor's attention.
- Main Heading H1: This is the most important text on the entire page, both for the user and for search engines (SEO). It should clearly and concisely answer the question "What do you offer?". Use your main keywords here.
- Subtitle: This expands on or complements the main headline. Here you can highlight a key benefit, clarify the offer details, or address a potential objection.
3. Call to Action (CTA) button
This is the element that turns a visitor into a customer. It should be as visible and understandable as possible.
- Button text: The text should be a verb that encourages action. Use more specific and motivating phrases: "Get a free quote," "Download the price list," "Schedule a consultation."
- Link for the button: Specify where the user will be directed after clicking the button. This can be:
- An anchor link to another section on the same page (e.g., the pricing section: #pricing)
- Affiliate link to another site.
- A direct download link (e.g., a file or APK).
Content section settings
The "Content Section" is the most versatile and flexible block in your website builder. Use it to describe your product, highlight its benefits, showcase its features, add a price list, and much more. You can add as many content sections to your page as you need.
1. Configuring the entire section
Before filling the section with content, you can set important parameters for it.
Section ID (anchor): This is a unique name for your section, which is used for navigation. For example, if you create a section called "Mobile Application," you can assign it the ID "app." Then, in the header settings, you can create a menu item "Mobile App" and specify the anchor link #app for it. When you click on this menu item, the page will smoothly scroll to that section.


Using HTML tags for SEO: In the text editors within the section, you can use special HTML tags to improve SEO and visually highlight text. Simply select the desired text and apply the tag:
- The strong and b tags: They make the text bold. Search engines consider the text inside the strong tag to be more important.
- The a tag: Creates a hyperlink to another website or page.
2. Adding elements inside a section.
Within each content section, you can combine various elements to create the desired structure.
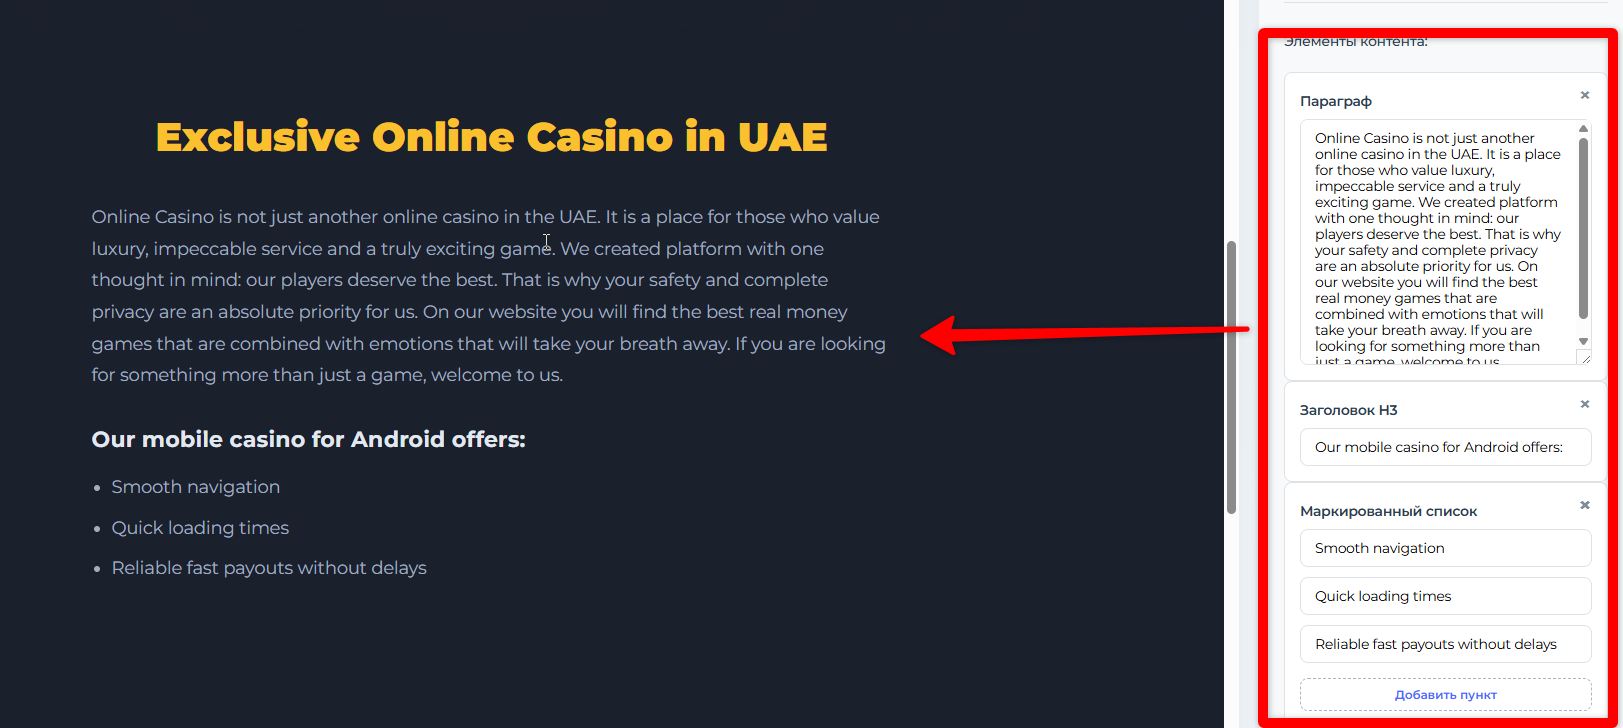
- H2 Heading: The main heading for the section (for example, "Our Advantages" or "How We Work").
- H3 Heading: A subheading used to divide information within a section (for example, "Quality Guarantee" under the main heading "Our Advantages").
- Text block: Used for writing regular paragraphs, descriptions, and any continuous text.
- Bulleted list: Ideal for listing advantages, features, or items that do not have a strict order.
- Numbered list: Used to describe step-by-step instructions, work stages, or rankings.
- Table: An excellent tool for comparing tariffs, displaying specifications, or any structured data. You can customize the required number of rows and columns.
- Image: Visualize your text with images. For each image, you can and should provide Alt text — a short description of the image, which is important for SEO and website accessibility.
- Button (CTA): Add a call-to-action button anywhere in the section to guide the user towards a specific action (for example, "Learn more," "View pricing").
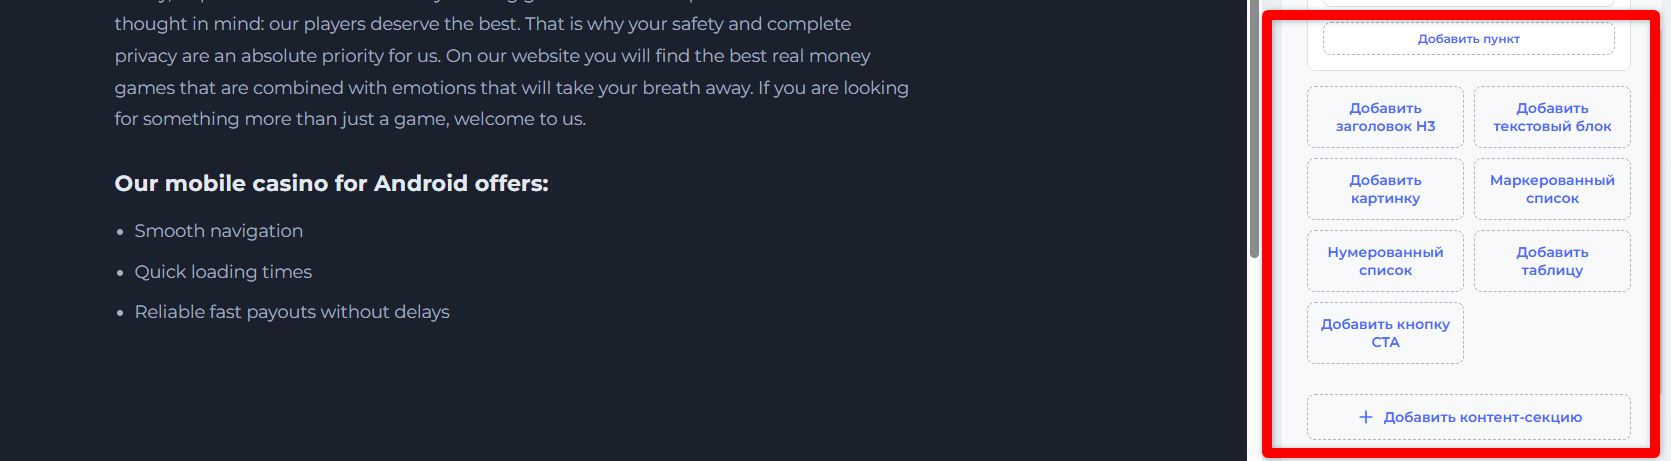
Content Structuring Tip: Alternate text blocks with images, lists, and tables. Break down large amounts of information into logical sections using H2 and H3 headings. This makes the text easy to read and improves the user experience.
Settings for the "FAQ Section" block (Frequently Asked Questions)
A Frequently Asked Questions (FAQ) section is an effective way to answer your potential customers' most common questions and address their objections before they even ask. A well-designed FAQ section increases trust in your offer, reduces the number of support requests, and helps users make a purchase decision faster.
On your landing page, the questions will be presented as an interactive list (accordion): the user sees the question, clicks on it, and the answer smoothly opens up.
1. Section title
This is the main heading for the entire block that users see. By default, it may be called "Frequently Asked Questions," but you can change it to anything else that better suits your style.
2. Adding and removing questions with answers.
This is the main functionality of the block. You can create a list of questions and answers that are most important to your audience.
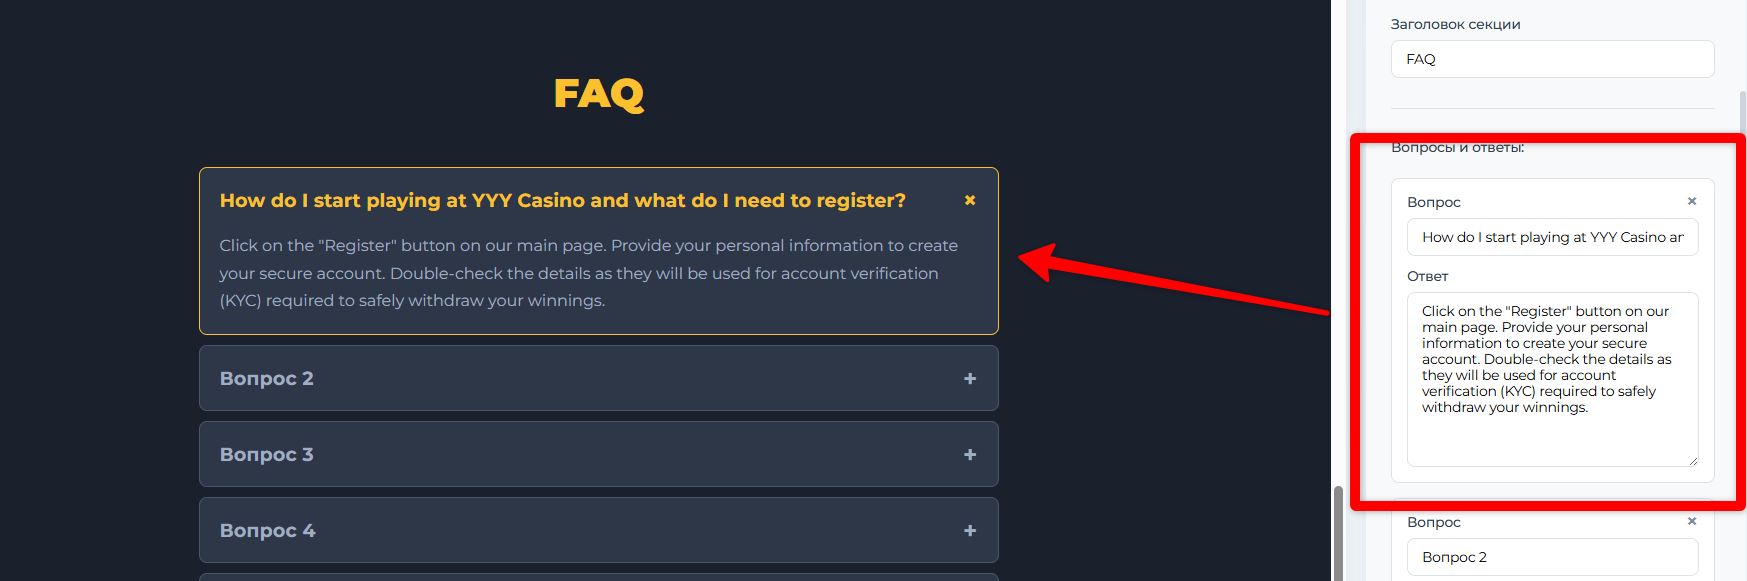
- Click the "Add question" button to create a new question-and-answer pair.
- Enter the question itself in the first field.
- In the second field, write a detailed and clear answer.
- You can add as many pairs as needed.
- To remove an unwanted question, simply click on the delete icon (the cross) next to it.
Tip for filling out the FAQ section: Think about what questions your customer might have on their way to making a purchase. What are their concerns? What might they find confusing?
Footer settings
The footer is a block located at the very bottom of your landing page. Although it's at the bottom of the page, its role is important. The footer usually contains service information, contact details, and links to social media. This helps build user trust and provides them with additional ways to contact you.

1. Copyright text
This is a text string in the footer that informs about copyright protection. It is also used to display important additional information.
2. Adding links to social media
Placing social media icons in the footer is a great way to connect your audience with your brand and let them follow your updates on their preferred platform.
How does this work:
- Find the desired social network in the list (for example, Facebook).
- Enter the full URL of your profile or page in the corresponding field.
- As soon as you insert the link, the corresponding icon will automatically appear in the footer of your website. If you leave the field empty, the icon will not be displayed.
Supported social networks:
- Twitter
- Facebook
- YouTube
- Instagram
- LinkedIn
Tip: Even if you don't actively manage social media accounts, having links to them increases user trust and shows that you're a legitimate business.
SEO settings (Search engine optimization)
SEO settings are your tool for communicating with search engines like Google and Yandex. By filling out these fields, you help search engine bots understand what your page is about and who should see it. This information is used to determine how your page (the snippet) will appear in search results.
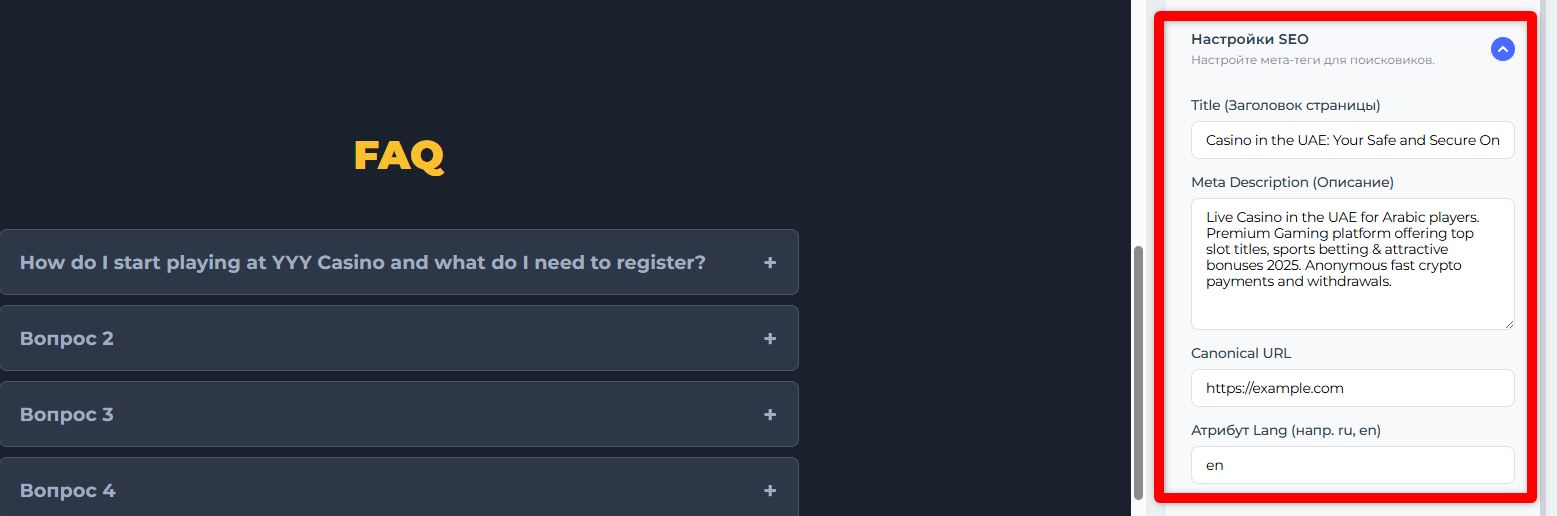
1. Title (Page title)
What is this? This is the most important SEO element. The text from this field is displayed:
- This is the clickable blue headline that appears in search results.
- In the browser tab title.
How to fill it out?
- Length: Try to keep it within 50-60 characters.
- Content: The title should be attractive and contain your most important search query (keyword). It should accurately reflect the essence of your offer.
2. Meta Description
What is this? It's a short text (1–2 sentences) that appears below the title in search results. Its purpose is to "sell" your page and convince users to click.
How to fill it out?
- Length: Approximately 150-160 characters.
- Content: Briefly describe your offer, mention the key benefits, and include a call to action (CTA). Use keywords, as they may be highlighted in bold in search results.
3. Canonical URL
What is this? This is a more technical parameter. It tells search engines the "main" or "preferred" version of a page if its content is available at several different URLs (to avoid problems with duplicate content).
How to fill it out?
- For most landing pages, this field can be left blank. The website builder will automatically insert the correct address for your page.
- You only need to fill in this field if you know for sure that this page is a copy of another one, and you want to specify the main address to the search engine.
4. Lang attribute (Page language)
What is this? This is code that tells search engines and browsers what language your page content is written in.
How to fill it out?
Please specify the two-letter language code in ISO 639-1 format.
- ru — for the Russian language
- en — for the English language
- uz — for the Uzbek language
And so on.
This helps search engines correctly target your page to an audience that speaks that language, and is also important for the proper functioning of translation tools and screen readers.
Markup settings
Structured data markup is special code added to your web page. It's invisible to visitors but acts as a "translator" for search engine bots (Google, Yandex) and social networks (Facebook, Telegram, VK). This code explains to them exactly what certain content on your landing page means.
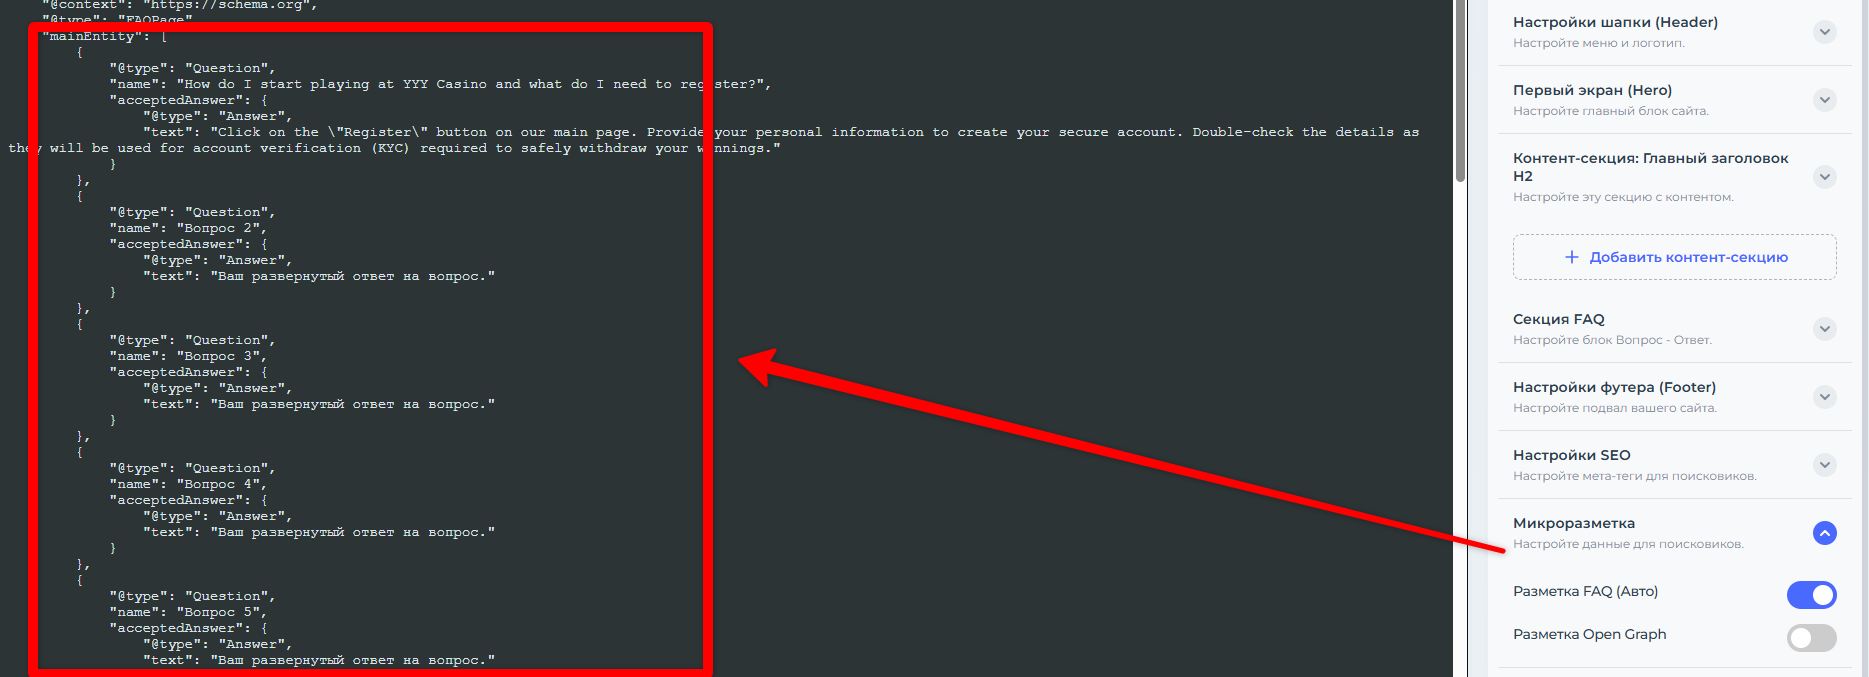
Why is this necessary? Pages with structured data look more prominent in search results and on social media, which directly impacts click-through rates.
1. FAQ markup (Automatically)
What is this? This is special markup for your "Frequently Asked Questions" section. It tells search engines that this section is a list of questions and answers.
What are the benefits? Google can use this markup to display your questions and answers directly in the search results below the link to your website. This makes your snippet (the description block of your website in the search results) larger, more informative, and more clickable.
How does this work?
No extra steps needed! If you've filled out the FAQ section in the builder, the system will automatically generate the correct markup. Just make sure that the switch for this function is active.
2. Open Graph markup (for attractive links on social media)
What is this? Open Graph is a micro-markup standard created by Facebook, which is used by all major social networks and messengers (Telegram, WhatsApp, VK, Twitter, etc.). By filling in these fields, you decide how the link to your landing page will look when someone shares it.
Instead of a plain URL, a rich preview card will appear with a title, description, and image.
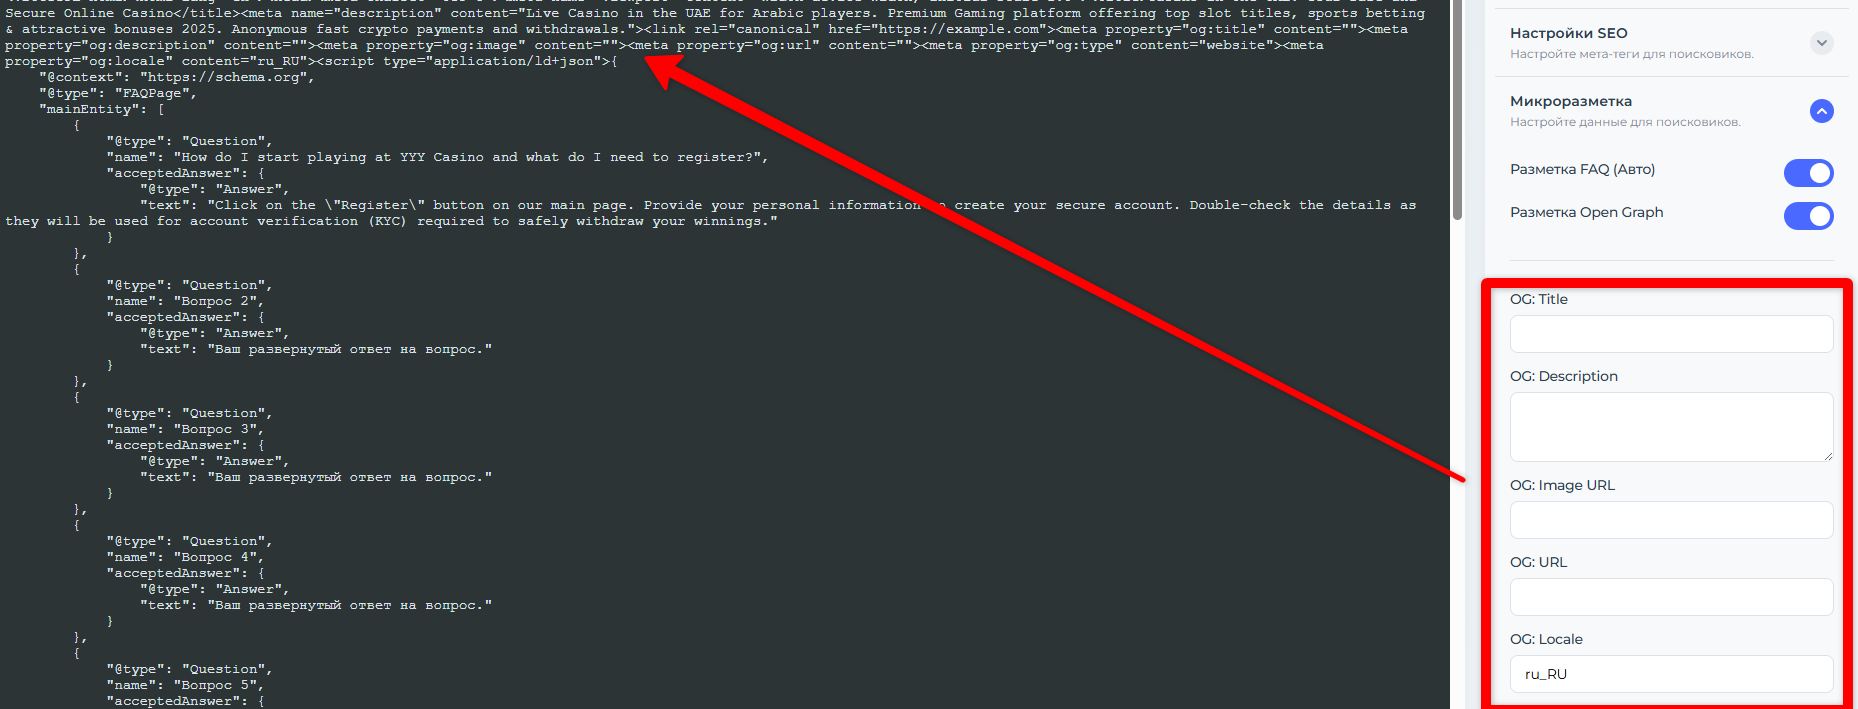
How to fill in Open Graph fields:
- OG: Title (Title for social media): A bold title that will be displayed in the link preview card. It can differ from your SEO title and be more promotional or "catchy".
- OG: Description (Description for social media): The text below the title. It should briefly describe your offer and motivate users to click on the link.
- OG: Image URL (Image URL for preview): This is the most important element. It's the link to the image that will be shown in the preview. Without an image, the link loses up to 80% of its appeal.
- OG: URL (Page URL): The full address of your page. The website builder can usually insert this automatically, but for reliability, it's best to specify it manually here.
- OG: Locale (Language and region): Specifies to social networks which language audience your content is intended for.
Professional tip: After filling in the Open Graph fields, check how your link will look using special services, such as the Facebook Sharing Debugger. This will help ensure that everything is displayed correctly.
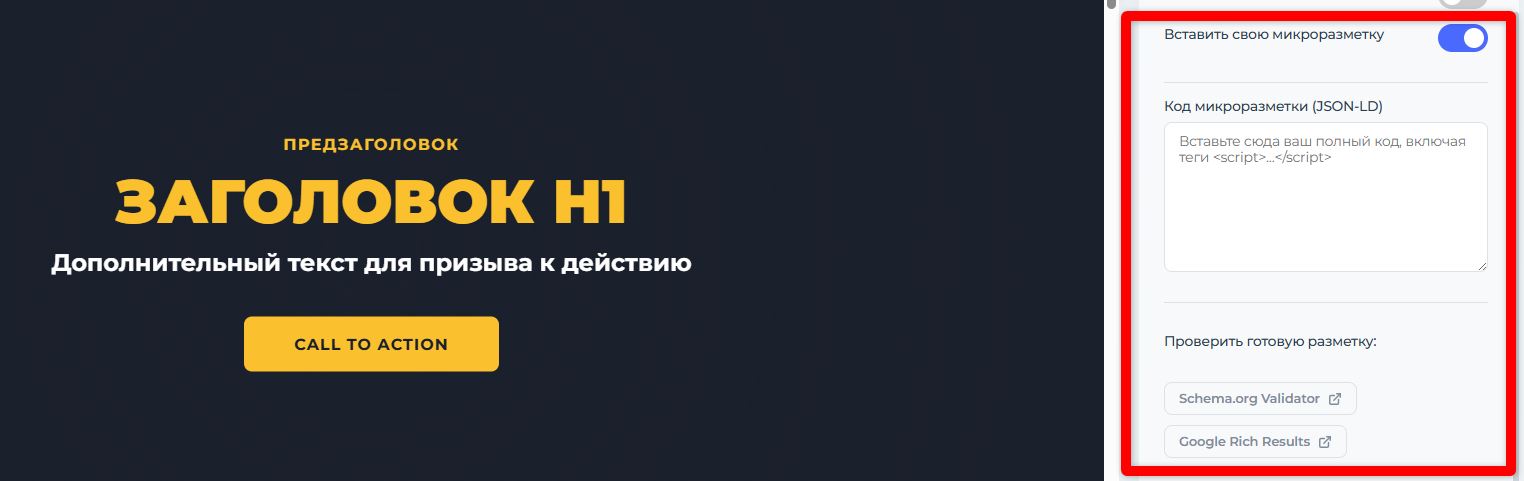
3. Custom Structured Data
This option is intended for experienced users and SEO specialists who require complete control over structured data on the page.
When you enable the "Custom markup" toggle, a text field will appear on the page. In this field, you can manually insert your own microdata code in JSON-LD or another supported format. This allows you to add any necessary schema to the page (for example, FAQPage, Product, Organization), even if there are no standard fields for it in the builder.
Important: Use this feature with caution. Incorrect or erroneous microdata code can negatively affect how search engines index your page. Always validate your code using specialized validators (such as Google's Schema Markup Validator) before saving.
Analytics Settings
Analytics helps you understand how users find your website and what they do on it. By connecting analytics services, you can track traffic, see which search queries bring users to your site, and identify technical errors.
Connecting Google Search Console (GSC)
Google Search Console is a free and essential tool from Google for website owners. It allows you to:
- See how Google sees your website.
- Find out which search queries users are using to find you in search results.
- Track down the errors that are preventing your website from ranking well.
- Inform Google that your website is ready for indexing.
How to connect?
To connect to GSC, you need to verify that you are the owner of the website. You'll need a verification code to do this.
Where can I get the Google verification code?
- Go to the website Google Search Console and sign in to your Google account.
- Add a new resource (website). Google will offer two options. Select "URL prefix" and enter the full address of your website.
- Google will offer several ways to verify ownership. Scroll down and select the method called "HTML tag".
- You will see a line of code that looks something like this: meta name="google-site-verification" content="**abcdefg12345ABCDEFG**"
- Copy only the set of characters that is inside the quotation marks content="...". In our example, this is abcdefg12345ABCDEFG. You do not need to copy the entire tag!
- Go back to the website builder, to the "Analytics" section, and paste the copied code into the "Google verification code" field.
Connecting Bing Webmaster Tools
This is a service from Microsoft that allows you to track how your website is represented in the Bing search engine. To connect it, copy the verification meta tag from your Bing Webmaster Tools account and paste it into this field. After that, you will be able to analyze search traffic from Bing, find and fix indexing errors, and manage the appearance of your landing page in this search engine.
Connecting Yandex.Metrica
One of the most popular tools for analyzing user behavior on a website. To connect, simply enter your Yandex.Metrica counter number (ID) into this field. This will allow you to track website traffic, traffic sources, user behavior using Webvisor, click and scroll maps, and also configure and track goal achievements (conversions).
Connecting Microsoft Clarity
This is a free service from Microsoft that helps you visualize user behavior on your landing page. Copy your project ID from Microsoft Clarity and paste it here. The service provides access to session recordings (video of visits), click heatmaps, and scroll maps. With it, you can clearly see what difficulties users encounter and which elements on the page attract the most attention.